 Ruby
RubyBefore you get started learning about Ruby algorithm development, make sure you go through our Getting Started Guide to learn how to create your first algorithm, understand permissions available, versioning, using the CLI, and more.
Table of Contents
- Available Libraries
- Write your First Algorithm
- Managing Dependencies
- I/O for your Algorithms
- Error Handling
- Algorithm Checklist
- Publish Algorithm
- Conclusion and Resources
Available Libraries
Algorithmia makes a number of libraries available to make algorithm development easier.
The full Ruby 2.2 language and standard library is available for you to use in your algorithms.
Furthermore, algorithms can call other algorithms and manage data on the Algorithmia platform via the Algorithmia Ruby Client.
Write your First Algorithm
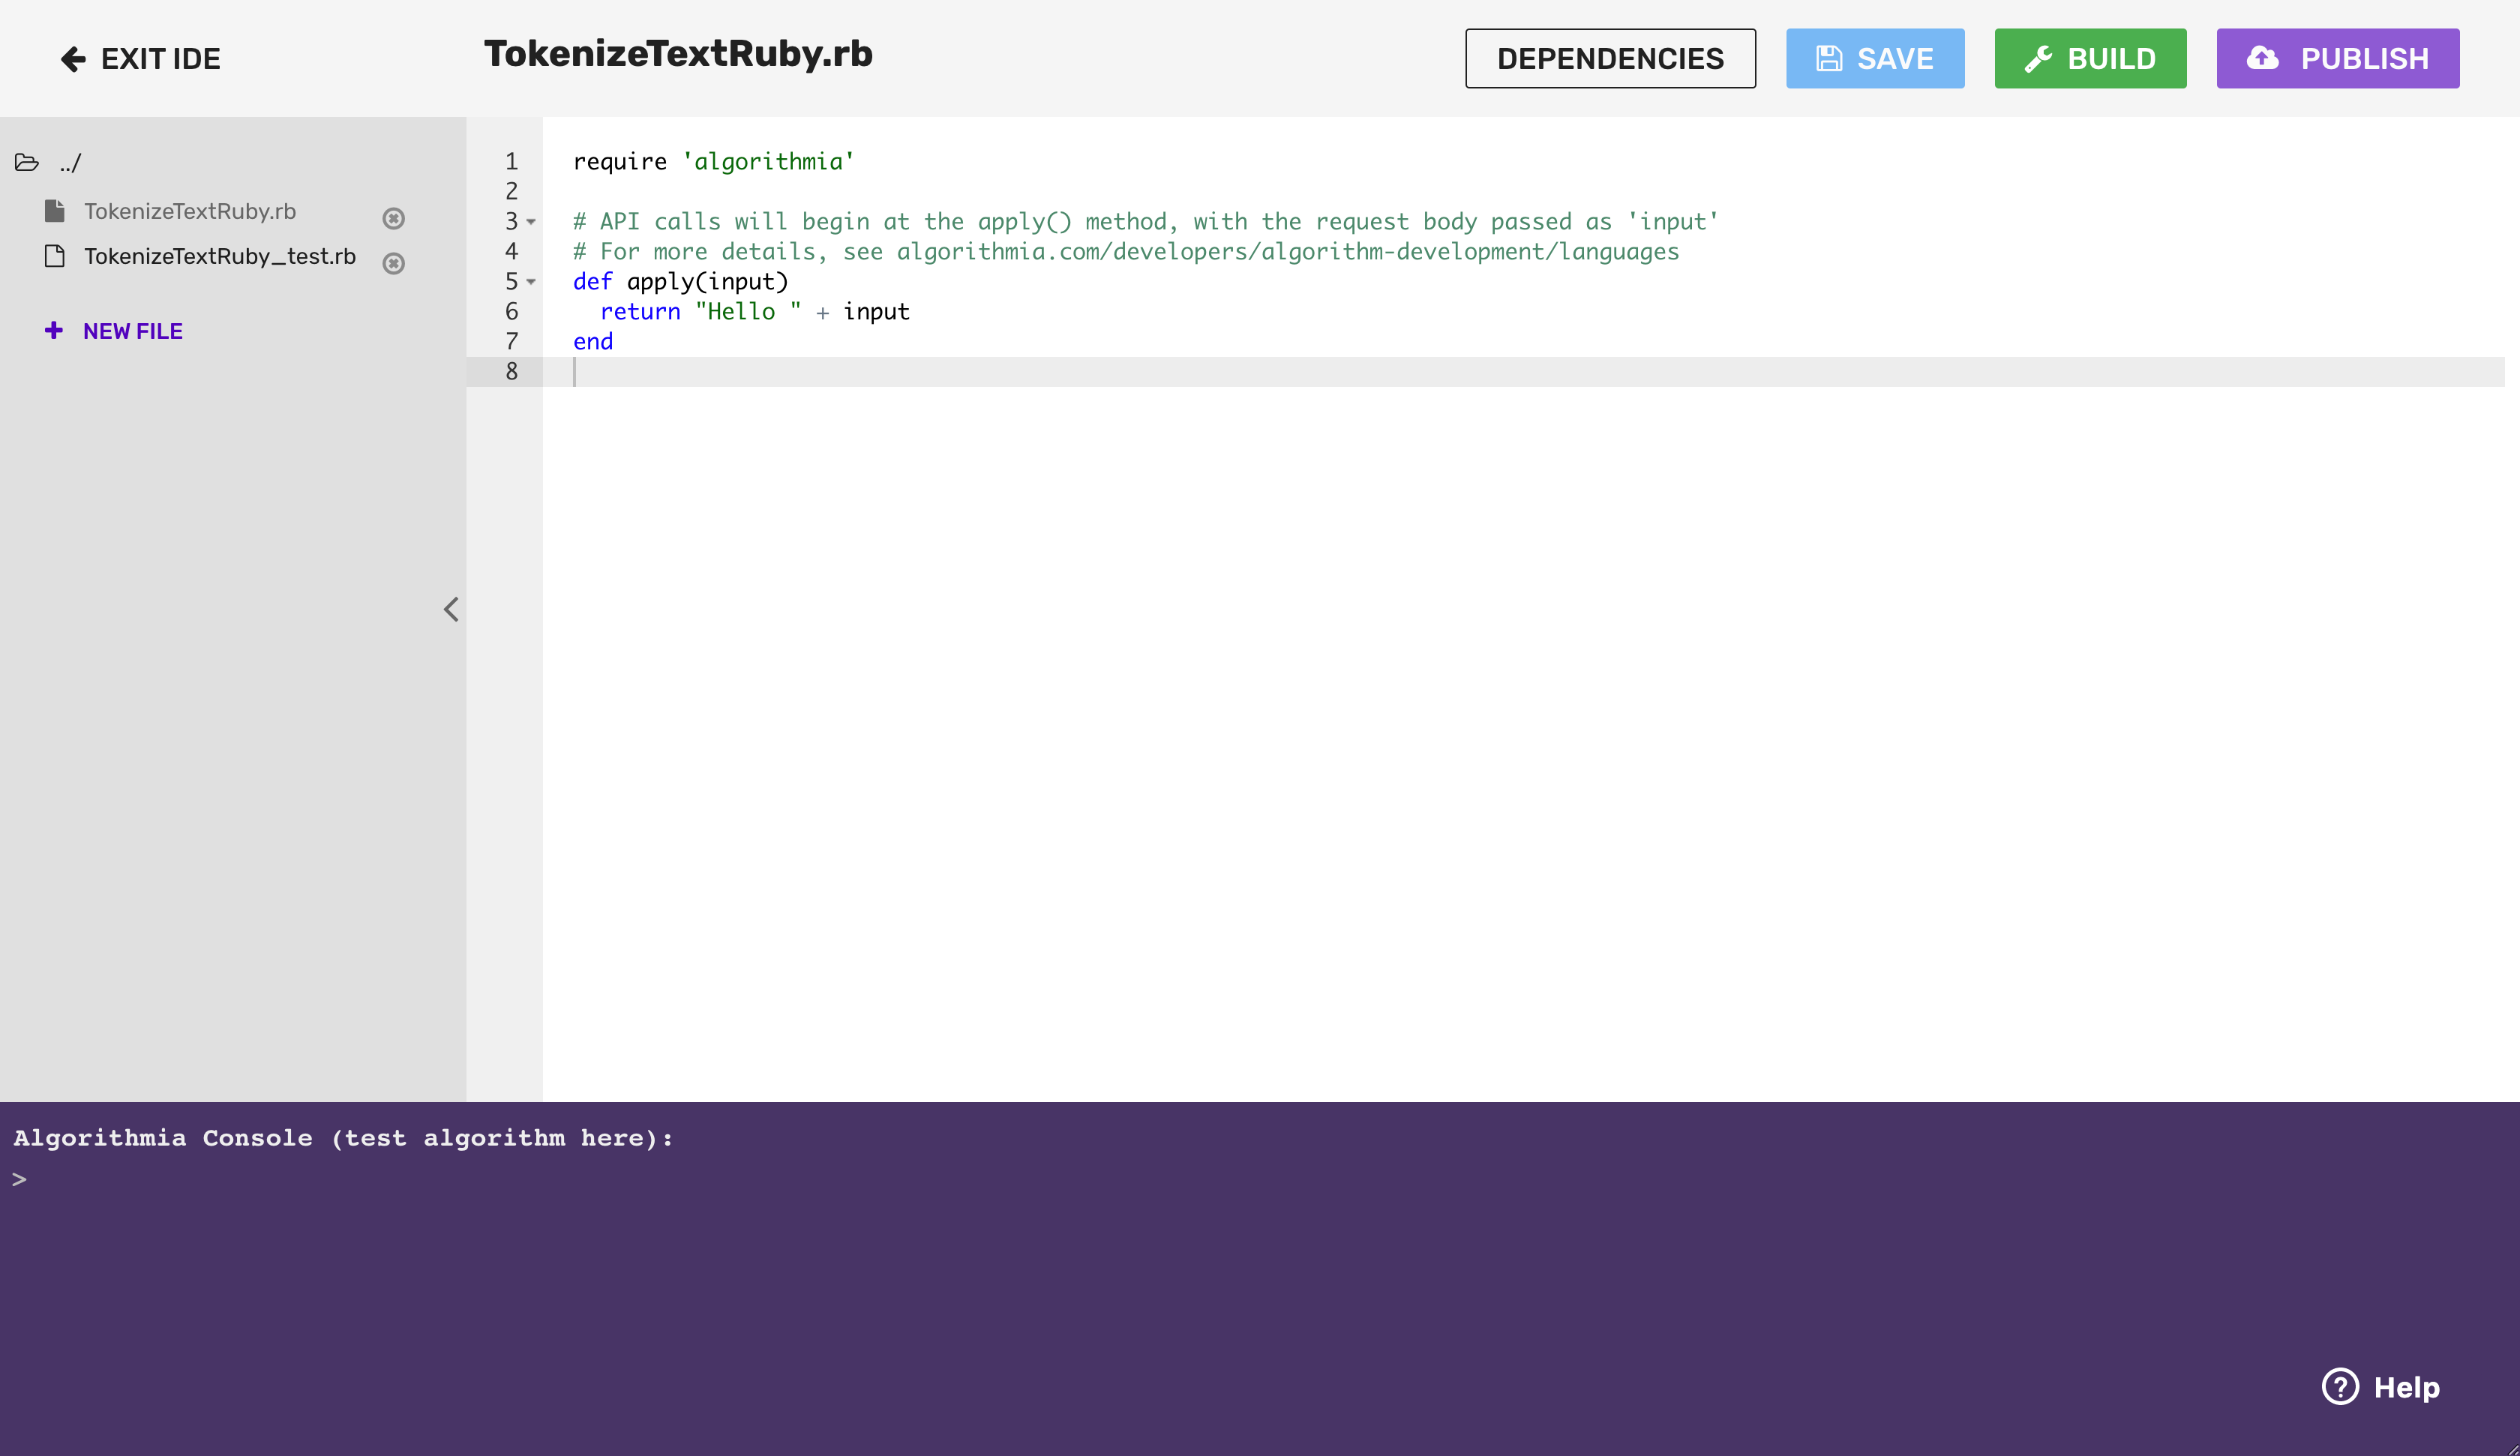
If you’ve followed the Getting Started Guide, you’ll notice in your algorithm editor, there is boilerplate code that returns “Hello” and whatever you input to the console.
The main thing to note about the algorithm is that it’s wrapped in the apply() function.
The apply() function defines the input point of the algorithm. We use the apply() function in order to make different algorithms standardized. This makes them easily chained and helps authors think about designing their algorithms in a way that makes them easy to leverage and predictable for end users.
Go ahead and remove the boilerplate code below that’s inside the apply() function because we’ll be writing a different algorithm in this tutorial:
Managing Dependencies
The algorithm we are about to create does not have any dependencies other than algorithmia (which is added by default), but it is important to know how to do this - so for now we’ll add phony just as an example.
Algorithmia supports adding 3rd partr.md#publish-algorithm Ruby Gems using a Gemfile, but you don’t need to create the Gemfile file manually. Instead, on the algorithm editor page there is a button on the top right that says “Dependencies”. Click that button and you’ll see a modal window:
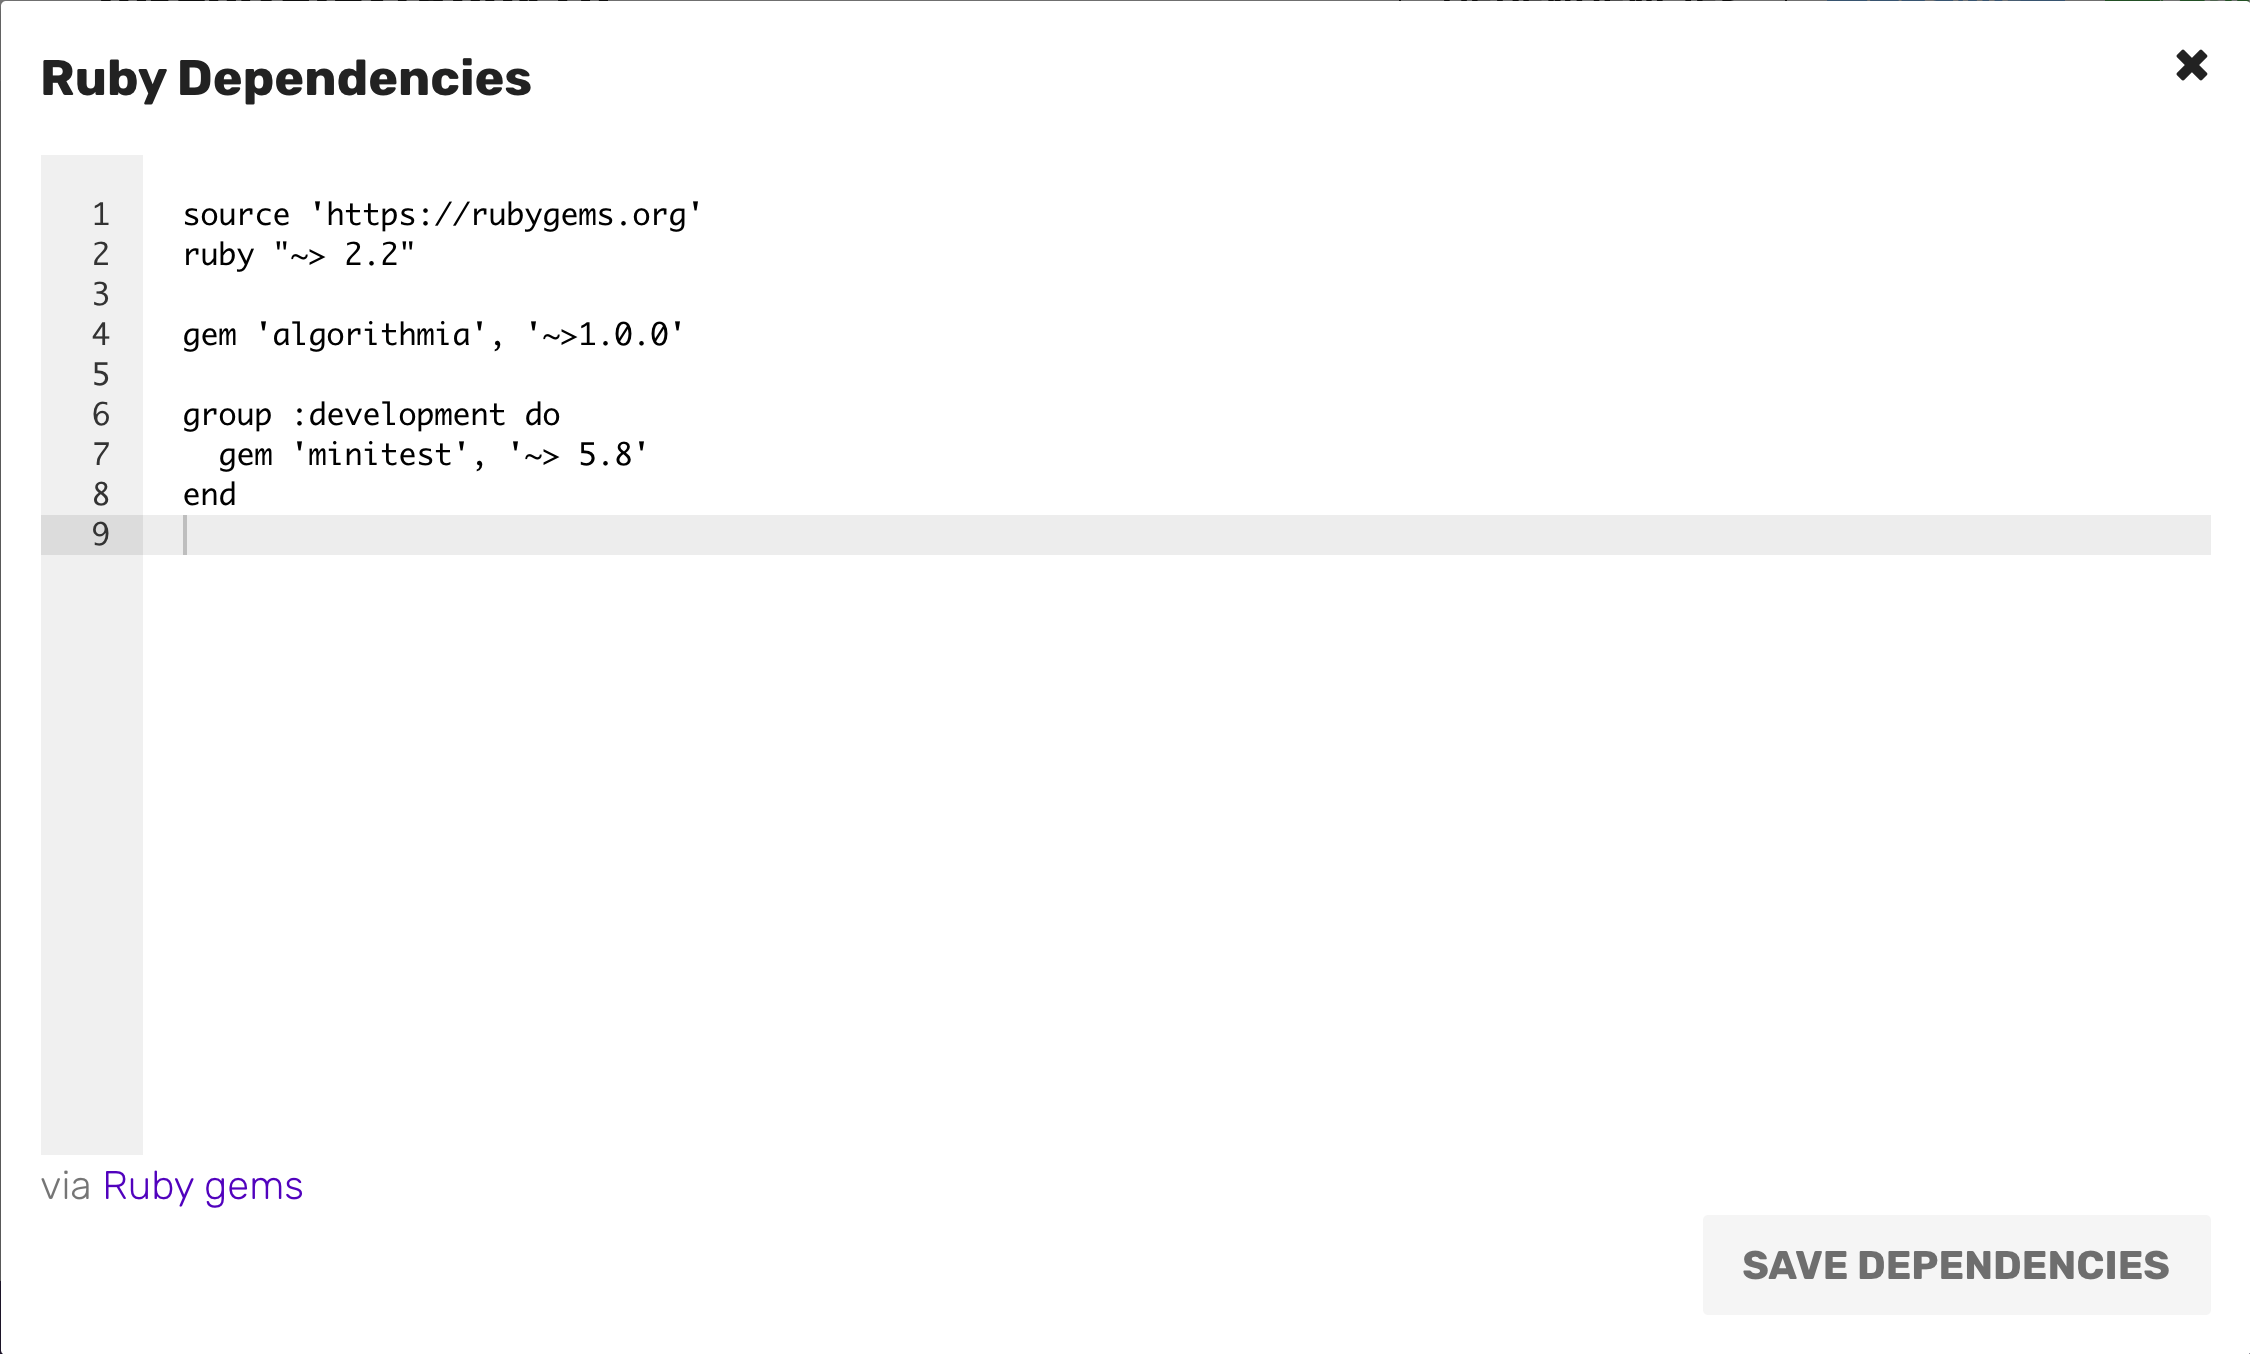
Add dependencies by adding the package name to the Gemfile. For example, to make use of phony, you would include the line
gem 'phony', '~>2.15.41'
Now click “Save dependencies” to close the modal window.
Note that you will still need to include a require statement to your algorithm file.
For example, to include phony, add the following to your .rb file:
require 'phony'
I/O for your Algorithms
Now let’s get started on the hands-on portion of the guide:
The first algorithm that we’ll create will take a JSON formatted object, which has been passed as input by the user. However, you don’t need to worry about deserializing the JSON; it is done automatically before the call to apply().
Your algorithm will output a JSON formatted object, which the user will consume via an API call to the algorithm path found at the bottom of the algorithm description page. This path is based on your Algorithmia user name and the name of your algorithm, so if you are “demo” and your algorithm is “TokenizeText”, then the path for version 0.1.1 of your algorithm will be demo/TokenizeText/0.1.1
Working with Basic Data Structures
Below is a code sample showing how to create an algorithm working with basic user input.
You’ll also see some error handling within the algorithm, but we recommend that you take a look at our Better Error Handling Guide for more information.
Note, if the input to your algorithm is a bare string (e.g. "world"), then input.instance_of? String will be true. However, we do not recommend accepting bare strings (JSON-encoded Objects are preferable), so we’ll return an error message in that case.
Following this, you can distinguish between simple Arrays vs Objects by using input.instance_of?(Array). Here’s an example that will accept either an Array, or an Object with the property “values” (which is an Array):
require 'algorithmia'

def apply(input)
    if input.instance_of?(String)
        raise TypeError, 'Please provide a JSON-formatted Array or Object'
    elsif input.instance_of?(Array)
        return {
            "datatype": "Array",
            "sum": input.reduce(:+)
        }
    elsif input["values"]
        return {
            "datatype": "Object",
            "sum": input['values'].reduce(:+)
        }
    else
        raise TypeError, 'Please provide an Array of "values"'
    end
end
Go ahead and type or paste the code sample above in the Algorithmia code editor after removing the “Hello World” code.
Now compile the new code sample and when that’s done test the code in the console by passing in the input and hitting enter on your keyboard:
{"values":[8,6,7,5,3,0,9]}This should return:
{"datatype":"object","sum":38}Note that this returns well-formatted JSON which will be easy for the user to consume.
You’ll get a similar result by passing in just [8,6,7,5,3,0,9], but giving it a bare string or an Object without a “value” property will return an error message.
When you are creating an algorithm be mindful of the data types you require from the user and the output you return to them. Our advice is to create algorithms that allow for a few different input types such as a file, a sequence or a URL.
Working with Data Stored on Algorithmia
This next code snippet shows how to create an algorithm working with a data file that a user has stored using Algorithmia’s Hosted Data Source.
Files stored in Hosted Data must be transferred into the algorithm before use, via the getFile method. Alternately, their contents can be transferred using getString, getJson, or getBytes.
Prerequisites
If you wish to follow along working through the example yourself, create a text file that contains any unstructured text such as a chapter from a public domain book or article. We used a chapter from Burning Daylight, by Jack London which you can copy and paste into a text file. Or copy and paste it from here: Chapter One Burning Daylight, by Jack London. Then you will can upload it into one of your Data Collections (create a collection, drop the file into the “Drop files here” area which appears at the bottom of the page).
This example shows how to create an algorithm that takes a user’s file stored in a data collection on the Algorithmia platform and splits up the text into sentences and words. This implementation simply splits the text on any dot, then on whitespace \s characters, and then filters out any empty strings. Once done, it passes back an Object containing the properties “text” (the raw text extracted from the file), and “words” (an Array of Arrays representing sentences and words) into the callback function:
require 'algorithmia'

def apply(input)
    client = Algorithmia.client()
    if !input.instance_of?(String) and !input.instance_of?(Array) and input["user_file"]
        text = client.file(input["user_file"]).get
        return {
            "text": text,
            "words": text.split(".").map {
                |s| s.gsub(/\s+/m, ' ').strip.split(' ')
            }
        }
    else
        raise TypeError, 'Please provide a value for "user_file"'
    end
end
After you paste the above code into the Algorithmia code editor you can compile and then test the example by passing in a file that you’ve hosted in Data Collections.
Following the example below, replace the path to your data collection with your user name (it will appear already if you are logged in), data collection name, and data file name which you can find under “My Collections” in Data Collections:
{"user_file": "data://YOUR_USERNAME/data_collection_dir/data_file.txt"}You should get back an structure like this, but longer:
{
    "text":"It was a quiet night in the Shovel...",
    "words":[["It","was","a","quiet","night","in","the","Shovel"],["At","the"...]]
}
Working with directories
While running, algorithms have access to a temporary filesystem located at /tmp, the contents of which do not persist across calls to the algorithm. While the Data API allows you to get the contents of the files you want to work with as JSON, a string, or raw bytes, in some cases you might need your algorithm to read and write files locally. This can be useful as a temporary location to store files downloaded from Hosted Data, such as raw data for processing or models to be loaded into your algorithms. It can also be used to write new files before uploading them via the Data API.
For reference, this gist provides an example of iterating over data in a directory, processing it, and writing new data to a file, while this template for ALBERT and Tensorflow provides an example of using the /tmp directory to load a model.
Writing files for the user to consume
Sometimes it is more appropriate to write your output to a file than to return it directly to the caller. In these cases, you may need to create a temporary file, then copy it to a Data URI (usually one which the caller specified in their request, or a Temporary Algorithm Collection):
# {"target_file":"data://username/collection/filename.txt"}
file_uri = input["target_file"]
tempfile = "/tmp/"+SecureRandom.uuid+".tmp"
save_some_output_to(tempfile)
client.file(file_uri).putFile(tempfile)
Calling Other Algorithms and Managing Data
To call other algorithms or manage data from your algorithm, use the Algorithmia Ruby Client which is automatically available to any algorithm you create on the Algorithmia platform. For more detailed information on how to work with data see the Data API docs and learn about Algorithmia’s Hosted Data Source.
When designing your algorithm, don’t forget that there are special data directories, .session and .algo, that are available only to algorithms to help you manage data over the course of the algorithm execution.
You may call up to 24 other algorithms, either in parallel or recursively.
Error Handling
In order to provide the user with useful feedback, raise an Error with a meaningful message, so that users can receive this as an error object in the response:
	begin
		x = Integer(input)
	rescue
		raise TypeError, 'Please provide a JSON-formatted Array or Object'
	end
For more information on error handling see the Better Error Handling Guide.
Algorithm Checklist
Before you are ready to publish your algorithm it’s important to go through this Algorithm Checklist and check out this blog post for Advanced Algorithm Development .
Both links will go over important best practices such as how to create a good algorithm description, add links to external documentation and other important information.
Publish Algorithm
Once you’ve developed your algorithm, you can publish it and make it available for others to use.
On the upper right hand side of the algorithm page you’ll see a purple button “Publish” which will bring up a modal:
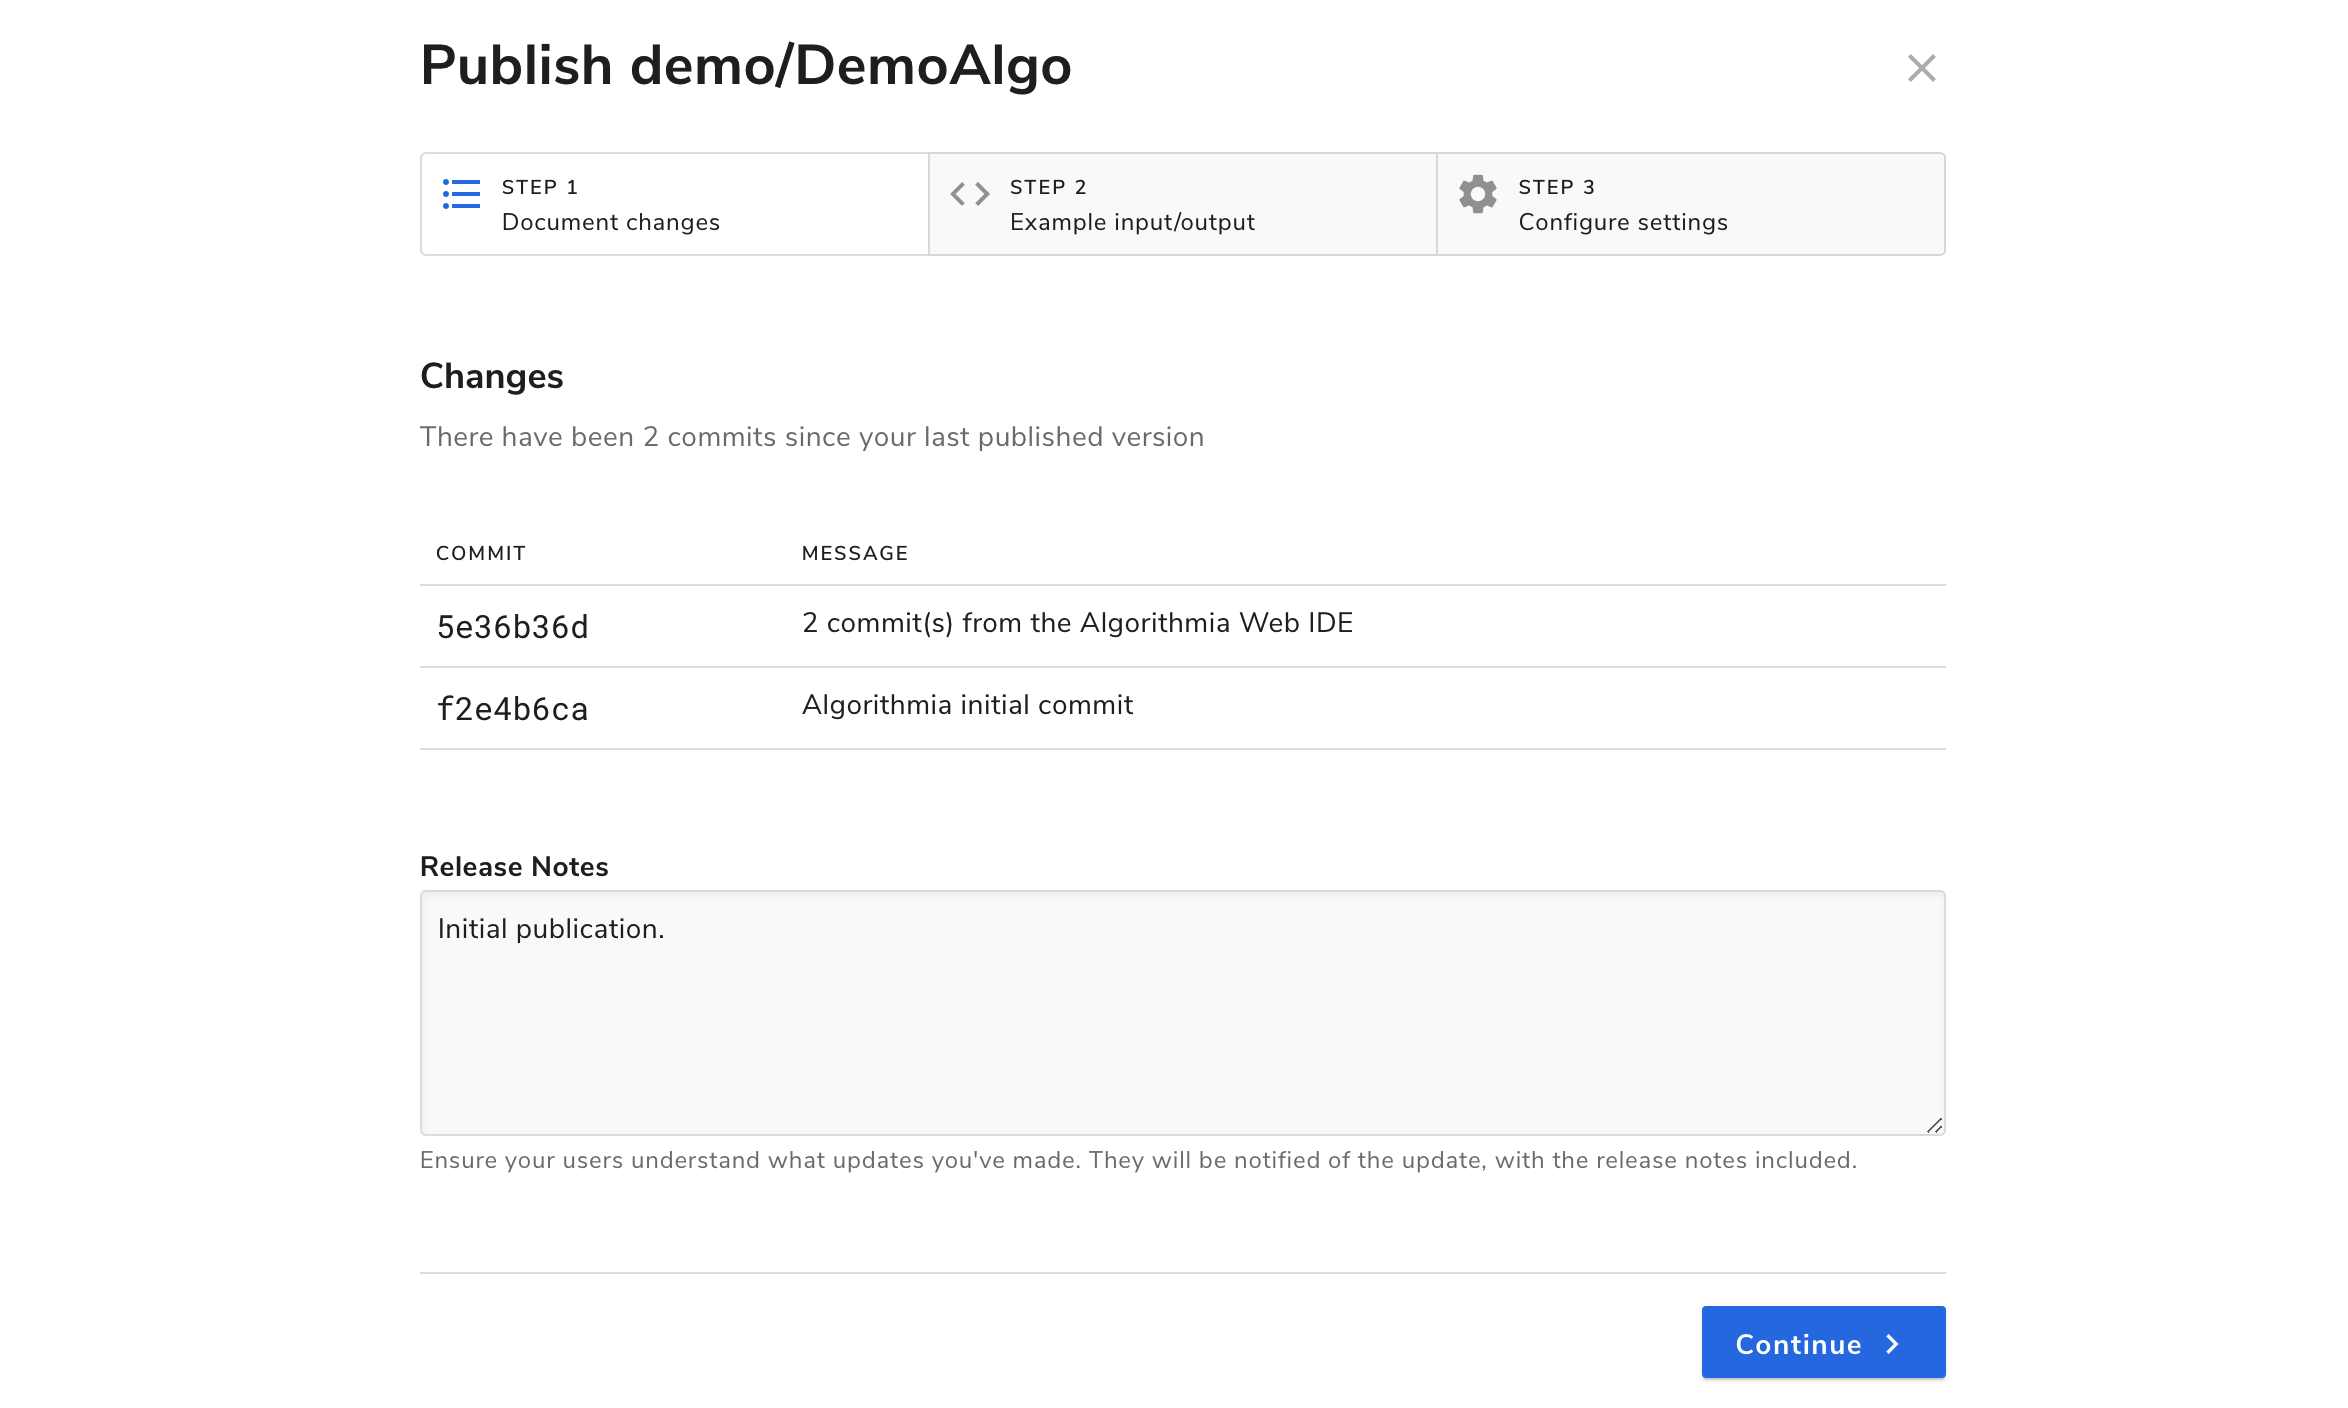
In this modal, you’ll see a Changes tab, a Sample I/O tab, and one called Versioning.
Changes shows you your commit history and release notes.
Sample I/O is where you’ll create your sample input and output for the user to try under Try the API in the Run tab. When you add a sample input, make sure to test it out with all the inputs that you accept since users will be able to test your algorithm with their own inputs.
Under the Versioning tab, you can select whether your algorithm will be for public use or private use as well as set the royalty. The algorithm can either be royalty-free or charge per-call. If you opt to have the algorithm charge a royalty, as the author, you will earn 70% of the royalty cost.
Check out Algorithm Pricing for more information on how much algorithms will cost to run.
Under Semantic Versioning you can choose which kind of release your change should fall under: Major, Minor, or Revision.
If you are satisfied with your algorithm and settings, go ahead and hit publish. Congratulations, you’re an algorithm developer!
Conclusion and Resources
In this guide we covered how to create an algorithm, work with different types of data and learned how to publish an algorithm.
For more resources: