This feature is currently in beta.
This feature is only available in Algorithmia Enterprise installations.
This guide will walk you through setting up Algorithmia Event Flows using an Apache Kafka message broker. Once configured, you can create event-driven workflows in which your algorithms publish messages to, and subscribe to messages from, topics on the broker. To learn about how Kafka can help you automate and maximize the business impact of your machine learning workflows, see our blog.
Creating and configuring a broker connection in the Algorithmia platform
In order to use Event Flows with Kafka, a cluster administrator must first connect an external Kafka broker to the Algorithmia cluster.
Once at least one Kafka broker has been connected, members of Algorithmia organizations can activate event-driven workflows for any organization-owned algorithm that a cluster administrator has enabled.
Enabling event-driven algorithm workflows
Once a cluster administrator sets up a broker connection and allows publish or subscribe access to a specific topic for a specific organization-owned algorithm, members of that organization will be able to activate Event Flows for that algorithm.
To get started, log in to the Algorithmia browser UI and navigate to the profile of the algorithm you’d like to configure. Note that, as described in the cluster admin configuration steps linked above), the algorithm must already be configured with access to a topic.
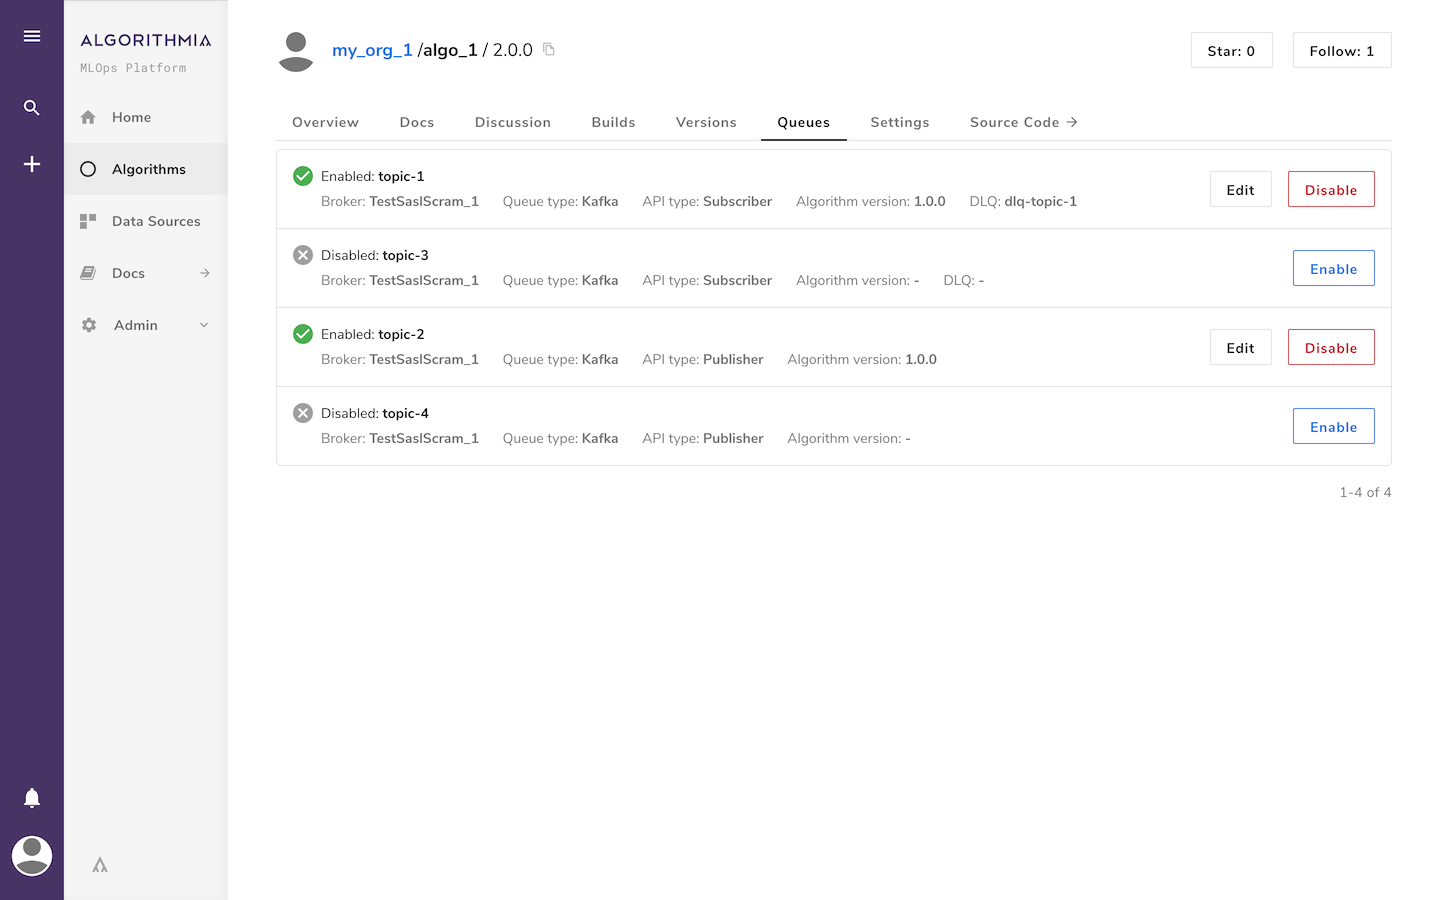
Click on the Events tab to see a list of broker topics that the algorithm can access.
There are action buttons on the right side of each listed broker; these will depend on the state of the topic. You’ll see an Enable button if the topic is disabled for the algorithm, and Disable and Edit buttons if the topic is enabled for the algorithm.

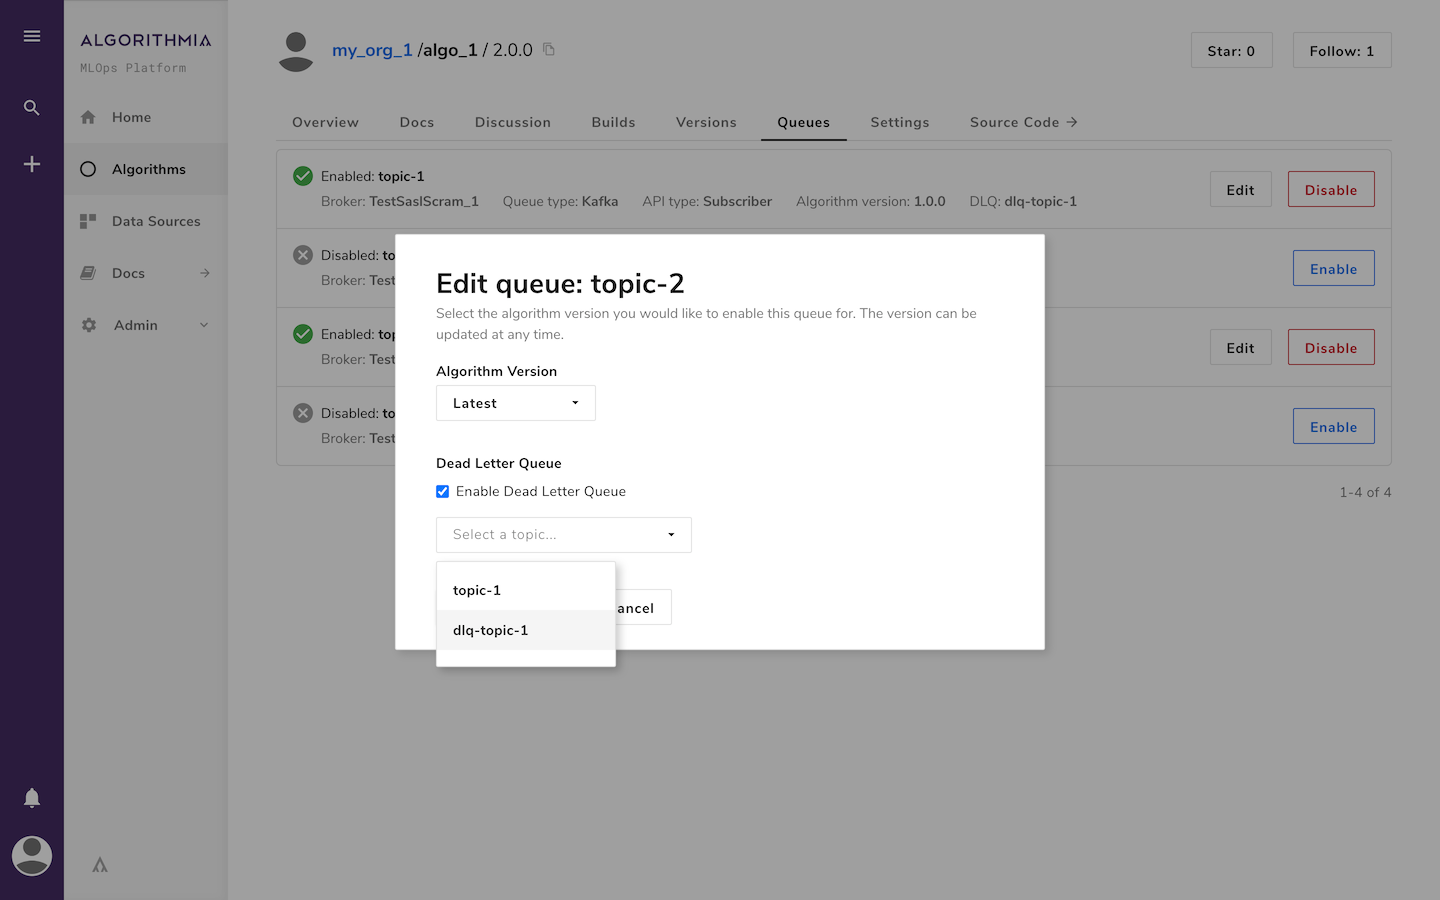
Clicking on the Enable (or Edit) button will present a dialog to select the appropriate algorithm version. Once a version is selected, submit it with the Enable Connection (or Save Changes) button to grant the algorithm access to the topic.

Clicking the Disable button will present a confirmation dialog. Once confirmed, the algorithm will no longer have access to the topic.
Clicking on the Enable Dead Letter Queue checkbox allows you to select a dead letter queue (DLQ) topic for an algorithm. Once a DLQ topic name has been selected, click the Enable Connection (or Save Changes) button to allow faulty messages to be sent to the selected DLQ topic.

 Apache Kafka