In this quick-start guide, we’ll walk through the process of developing a classic “Hello World” algorithm on Algorithmia.
We’ll develop an algorithm in Python, but all the steps shown here are the same in all programming languages supported on the platform. To see specific code examples in the languages we support, check out Algorithm Development Languages.
Note: this guide uses Algorithmia’s browser UI to create and deploy your algorithm. If you prefer a code-only approach to development, see Algorithm Management.
Table of contents
- Creating your first algorithm
- Developing your algorithm in the Web IDE
- Publishing your algorithm
- Calling your algorithm
- Quick Reference: Local Development vs. Web IDE
- Next steps
Creating your first algorithm
To get started, navigate to Algorithmia, click the “Create New” button in the upper-right corner, and select the “Algorithm” option. This will navigate you to a modal, which you’ll fill out step-by-step below.

Owner and name
Select your account name as the algorithm owner, and provide a descriptive name for your algorithm. For example, in natural language processing, the process of splitting up text into discreet words is called tokenizing, so an algorithm that performs this function could be called “TokenizeText”. Your algorithm’s name will serve as its unique identifier on the platform, and it will be used to call your algorithm via the API.

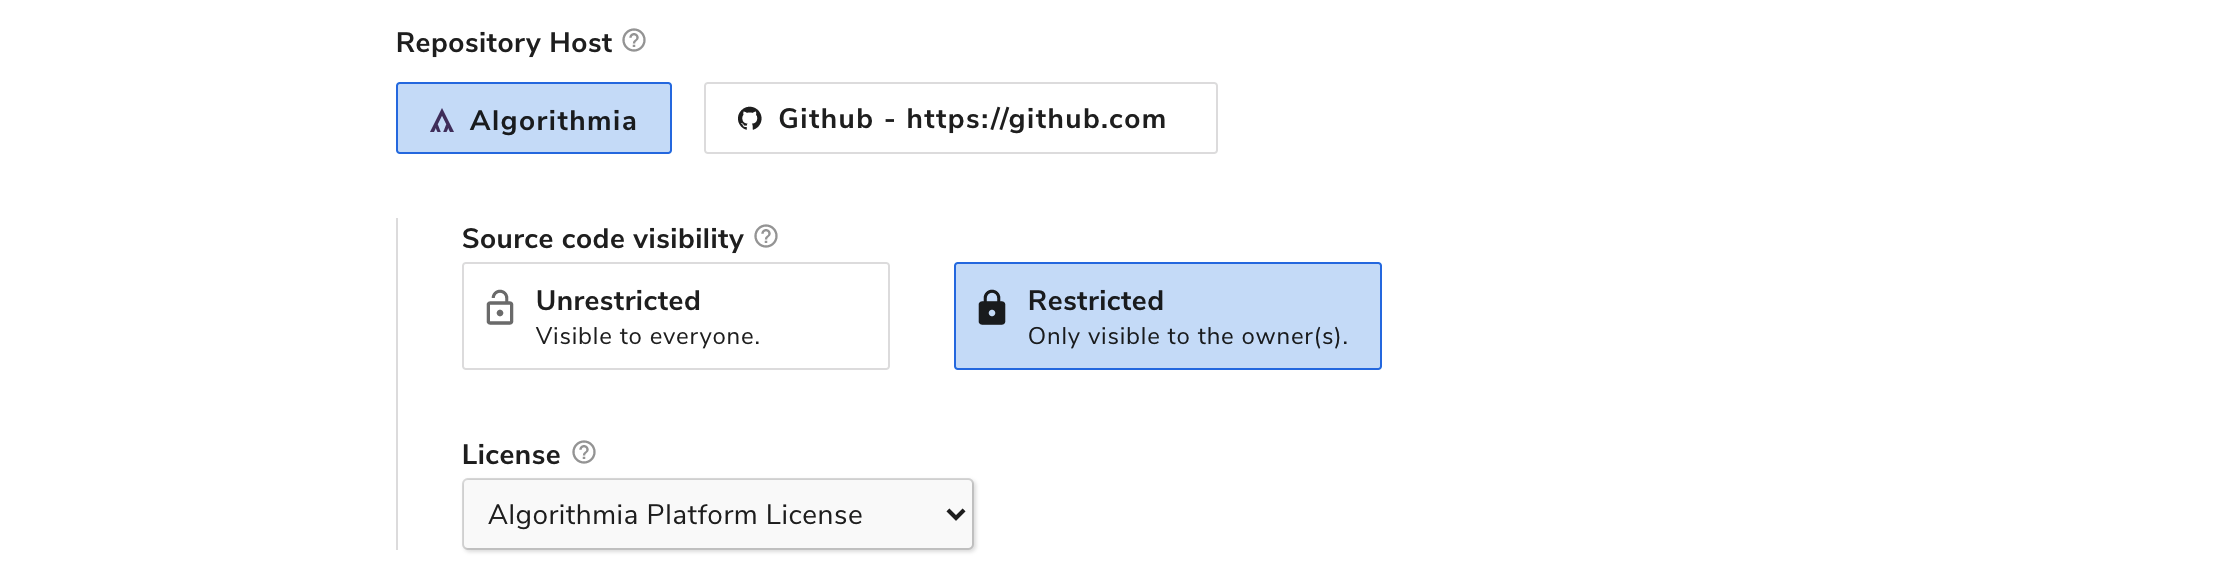
Source code
In this section, you can customize the visibility, licensing, and hosting of your algorithm’s source code. For your algorithm, just leave the defaults so that the source code is hosted privately on our platform under the Algorithmia Platform License. You can read more about creating algorithms with GitHub or GitHub Enterprise in our Source Code Management docs.
Note: if you’re on the Algorithmia Teams tier, these Source Code options won’t be available. Your source code will always be hosted privately on our platform—only your team will be able to view it.
Environment
In this section, you can specify your algorithm’s runtime environment. For your algorithm, go ahead and select Python 3.x for the language and Python 3.7 for the environment, because your example algorithm won’t require any external library dependencies.

When you develop an algorithm on our platform, you’ll need to consider what machine learning framework(s) it’ll need and whether it would benefit from using a graphics processing unit (GPU) to accelerate certain kinds of computation, such as image processing and deep learning. Certain algorithm environments come pre-loaded with GPU computing capabilities and specific machine learning frameworks. This includes Nvidia drivers, CUDA support, and several of the most popular deep learning frameworks, including MXNet, Pytorch, Spacy, and TensorFlow.
Settings
In this section you can adjust your algorithm’s access permissions. Leave the defaults so that your algorithm can access the public internet as well as call other algorithms on the platform.

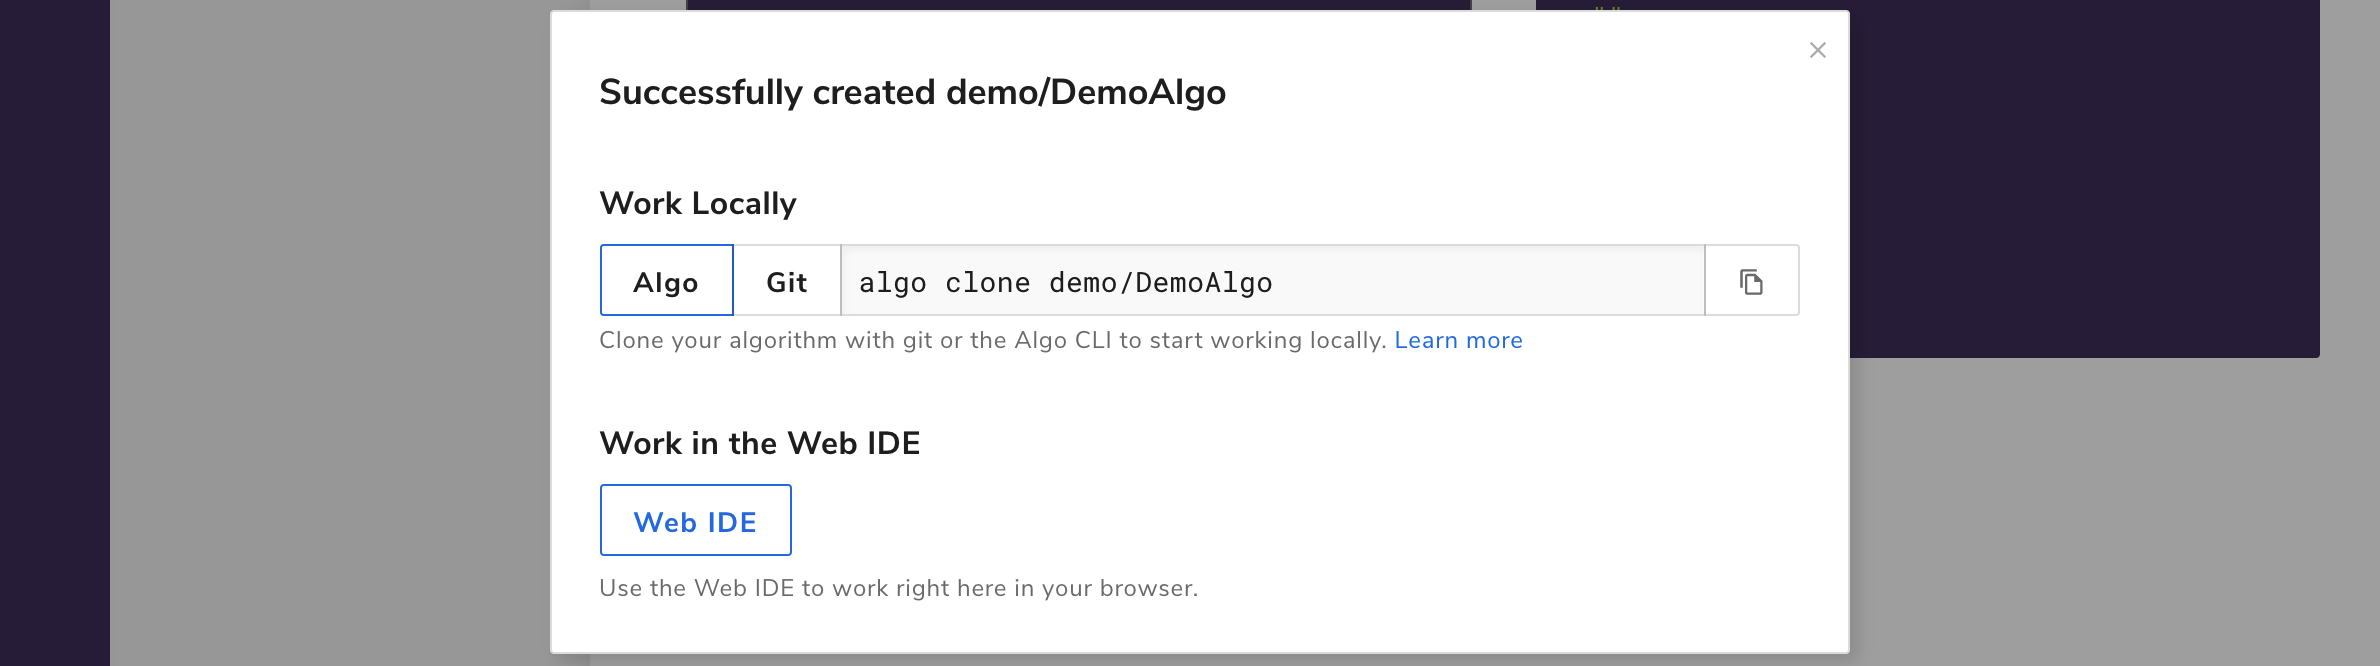
Click the “Create New Algorithm” button at the bottom of the form and you’ll see the following modal.
Developing your algorithm in the Web IDE
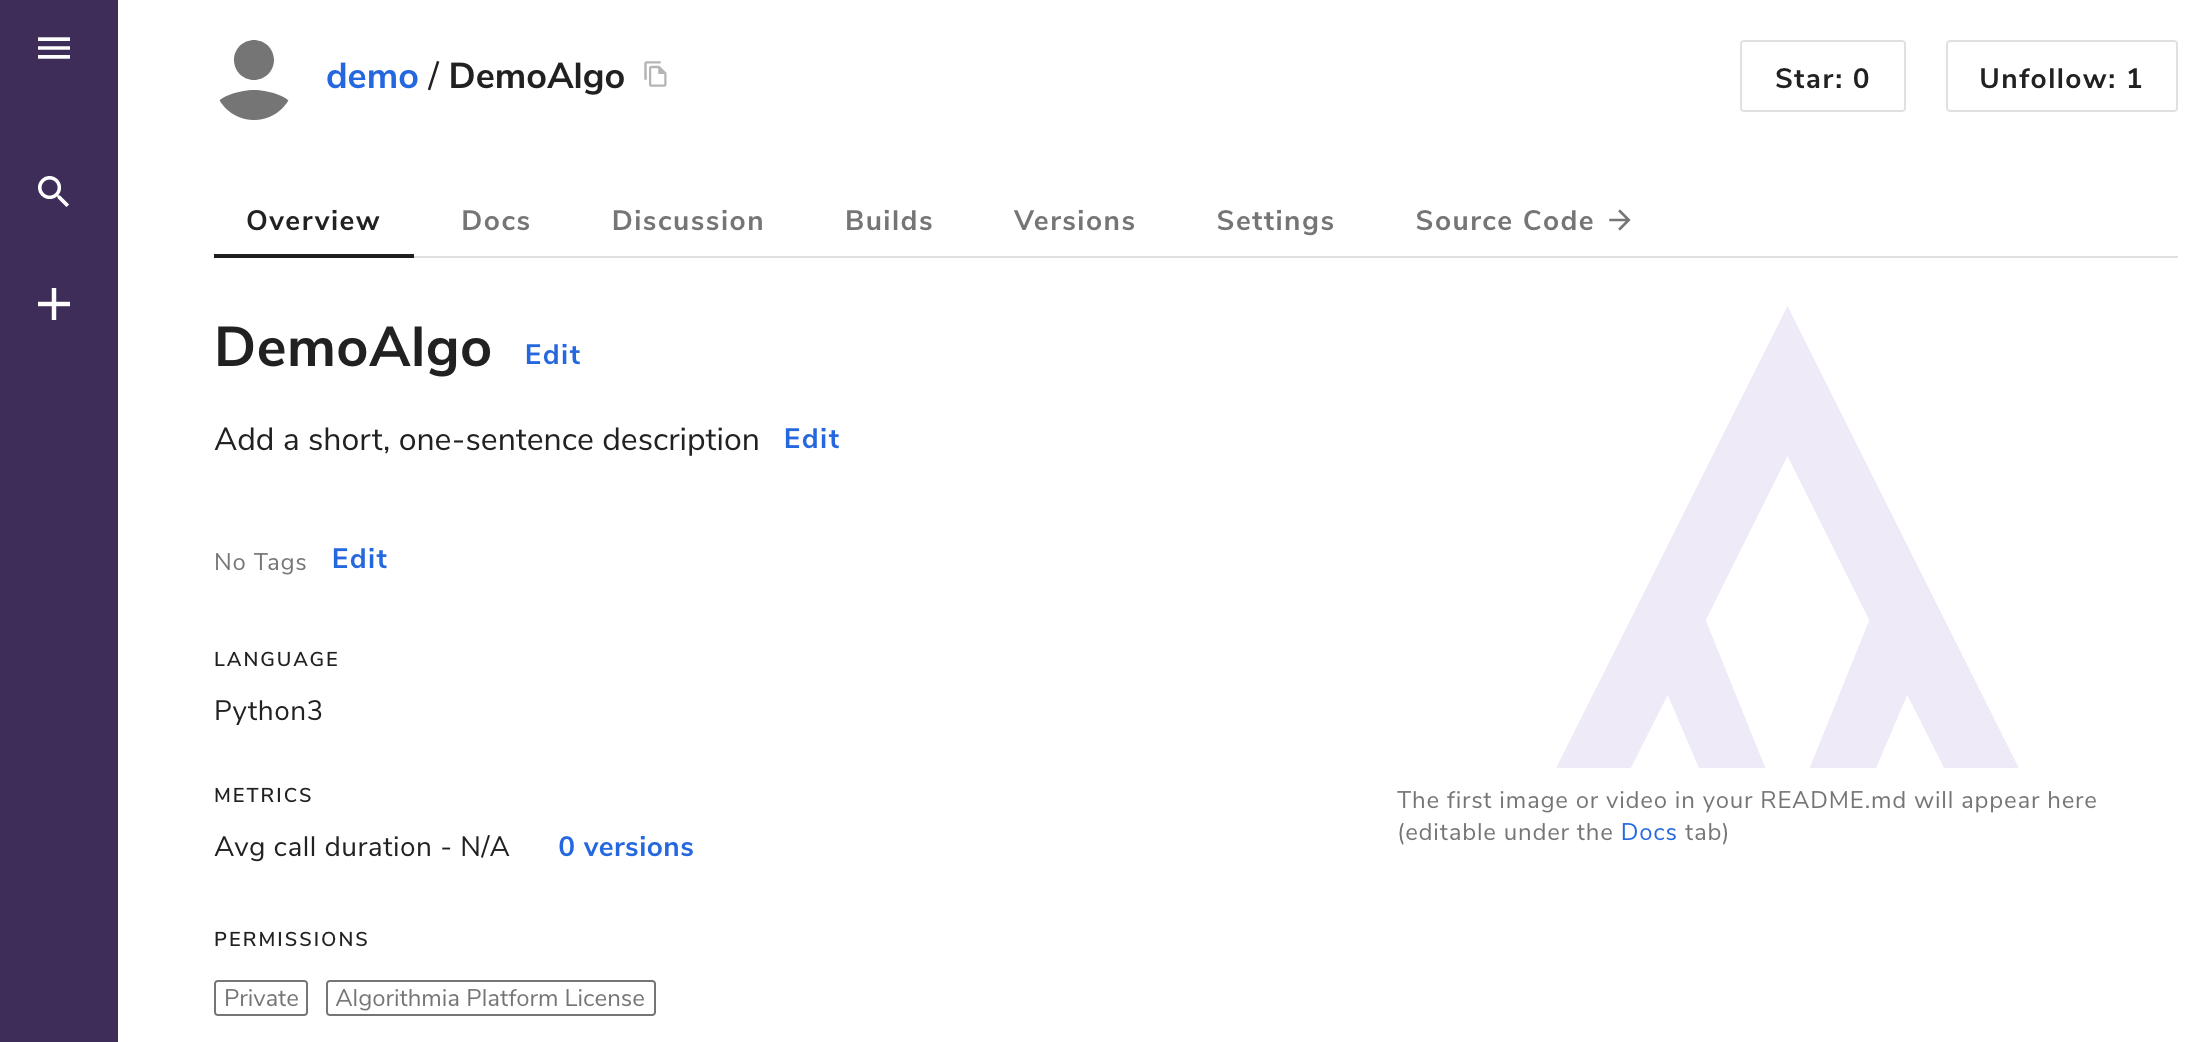
To access Algorithmia’s built-in Web IDE, click the “Web IDE” button in the modal, or click the Source Code tab from your newly created algorithm’s homepage if the modal is no longer shown.
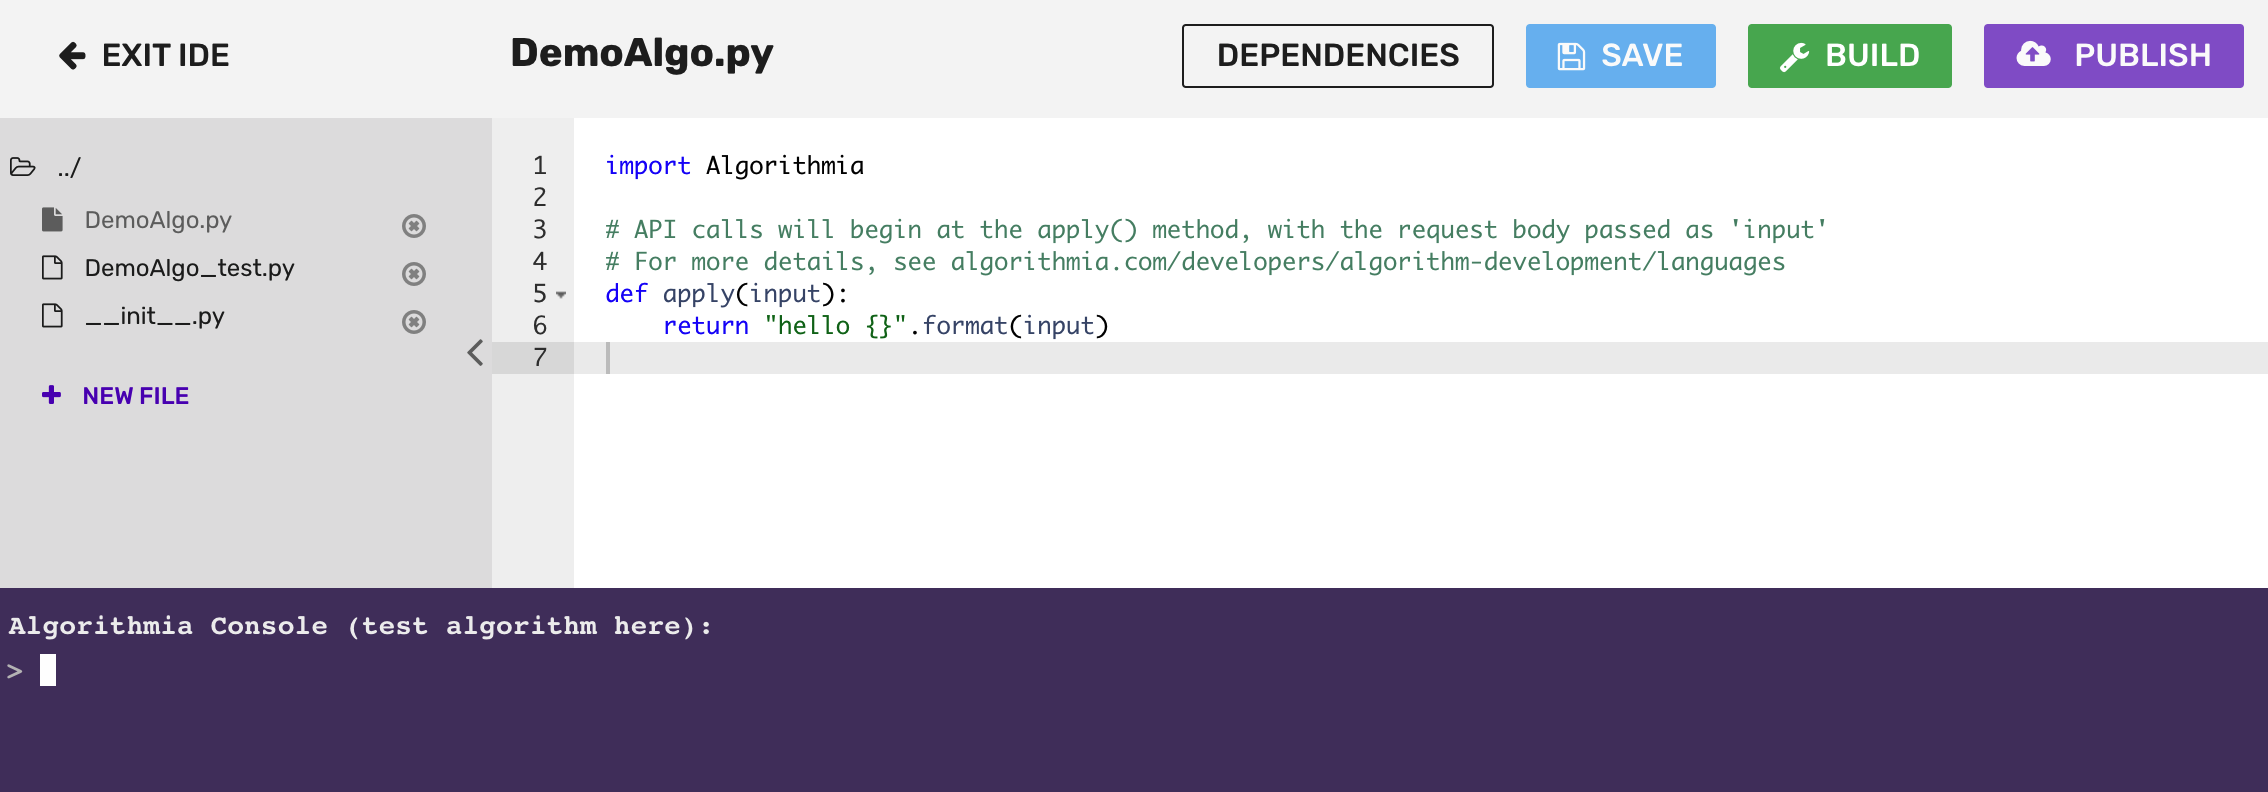
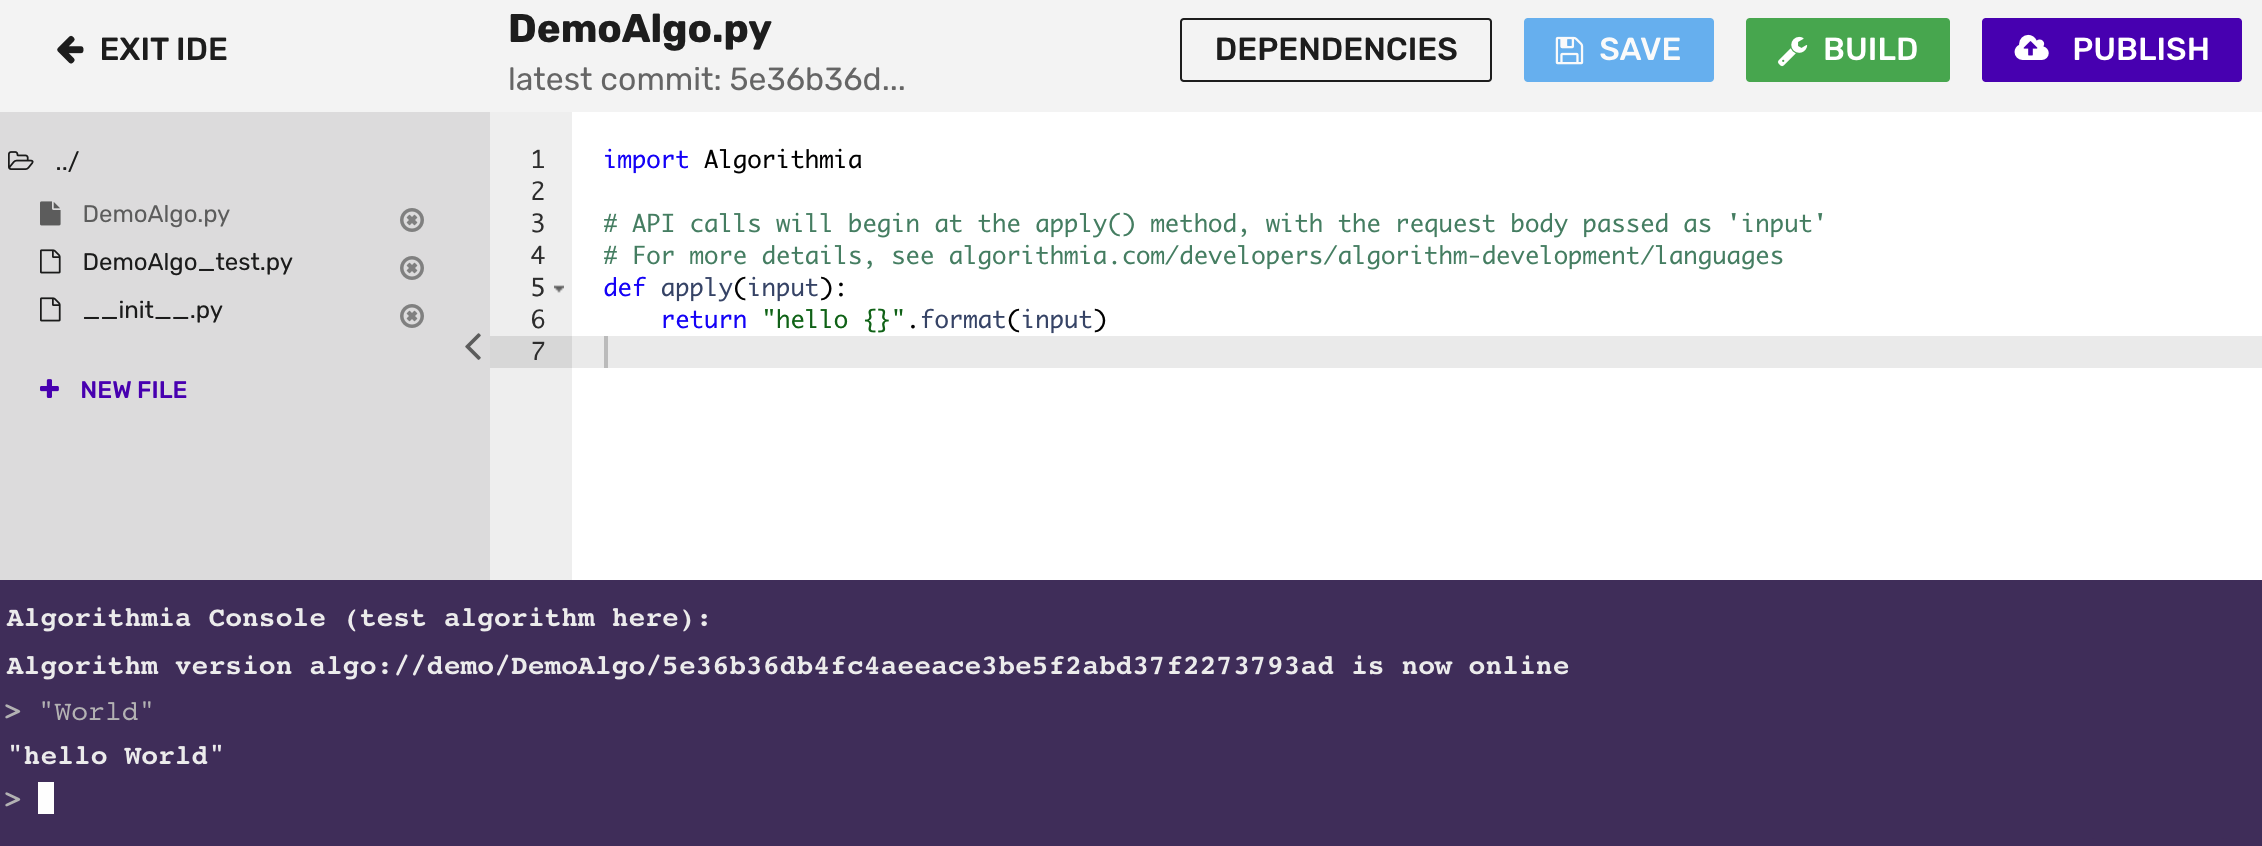
In the Web IDE, you’ll see that your algorithm comes with some template code: a function called apply() that takes a string as input and returns “Hello” concatenated with that string.
On Algorithmia, every algorithm is required to have an apply() function—it defines the algorithm’s entry point and serves to standardize algorithms across the platform regardless of programming language. Authors are encouraged to leverage this standardization and to design their algorithms in a way that makes them predictable for end users and that supports algorithm pipelining (chaining multiple algorithms together).
In order to run the algorithm, you’ll first need to compile (build) it by clicking the “Build” button on the top-right corner of the source code editor. You’ll need to complete this step even for an interpreted language such as Python, because we still need to package up all the source code into a callable algorithm instance on the back end.
At the bottom of the page in the test console you’ll see a confirmation when your algorithm’s been built successfully, along with the version hash. Once the build completes, you can test out your algorithm by passing it input through the test console. For example, try running the algorithm with the input “World” (make sure to include the double quotes, because algorithm input must be valid JSON).
Note: the first time you run your algorithm it might take some time to return a value; subsequent runs will return much more quickly.
If you’d like, you can edit the source code, for example by changing it to return an “Hola” instead of a “Hello”. Every time you want to re-test the algorithm, you’ll need to click the green “Build” button and wait for the build confirmation message.
Publishing your algorithm
The best part of developing on Algorithmia is that you and other users can call your algorithms via an API that takes only a few lines of code to use! To enable this, you must first start the publishing flow by clicking the purple “Publish” button at the upper-right corner of the source code editor.
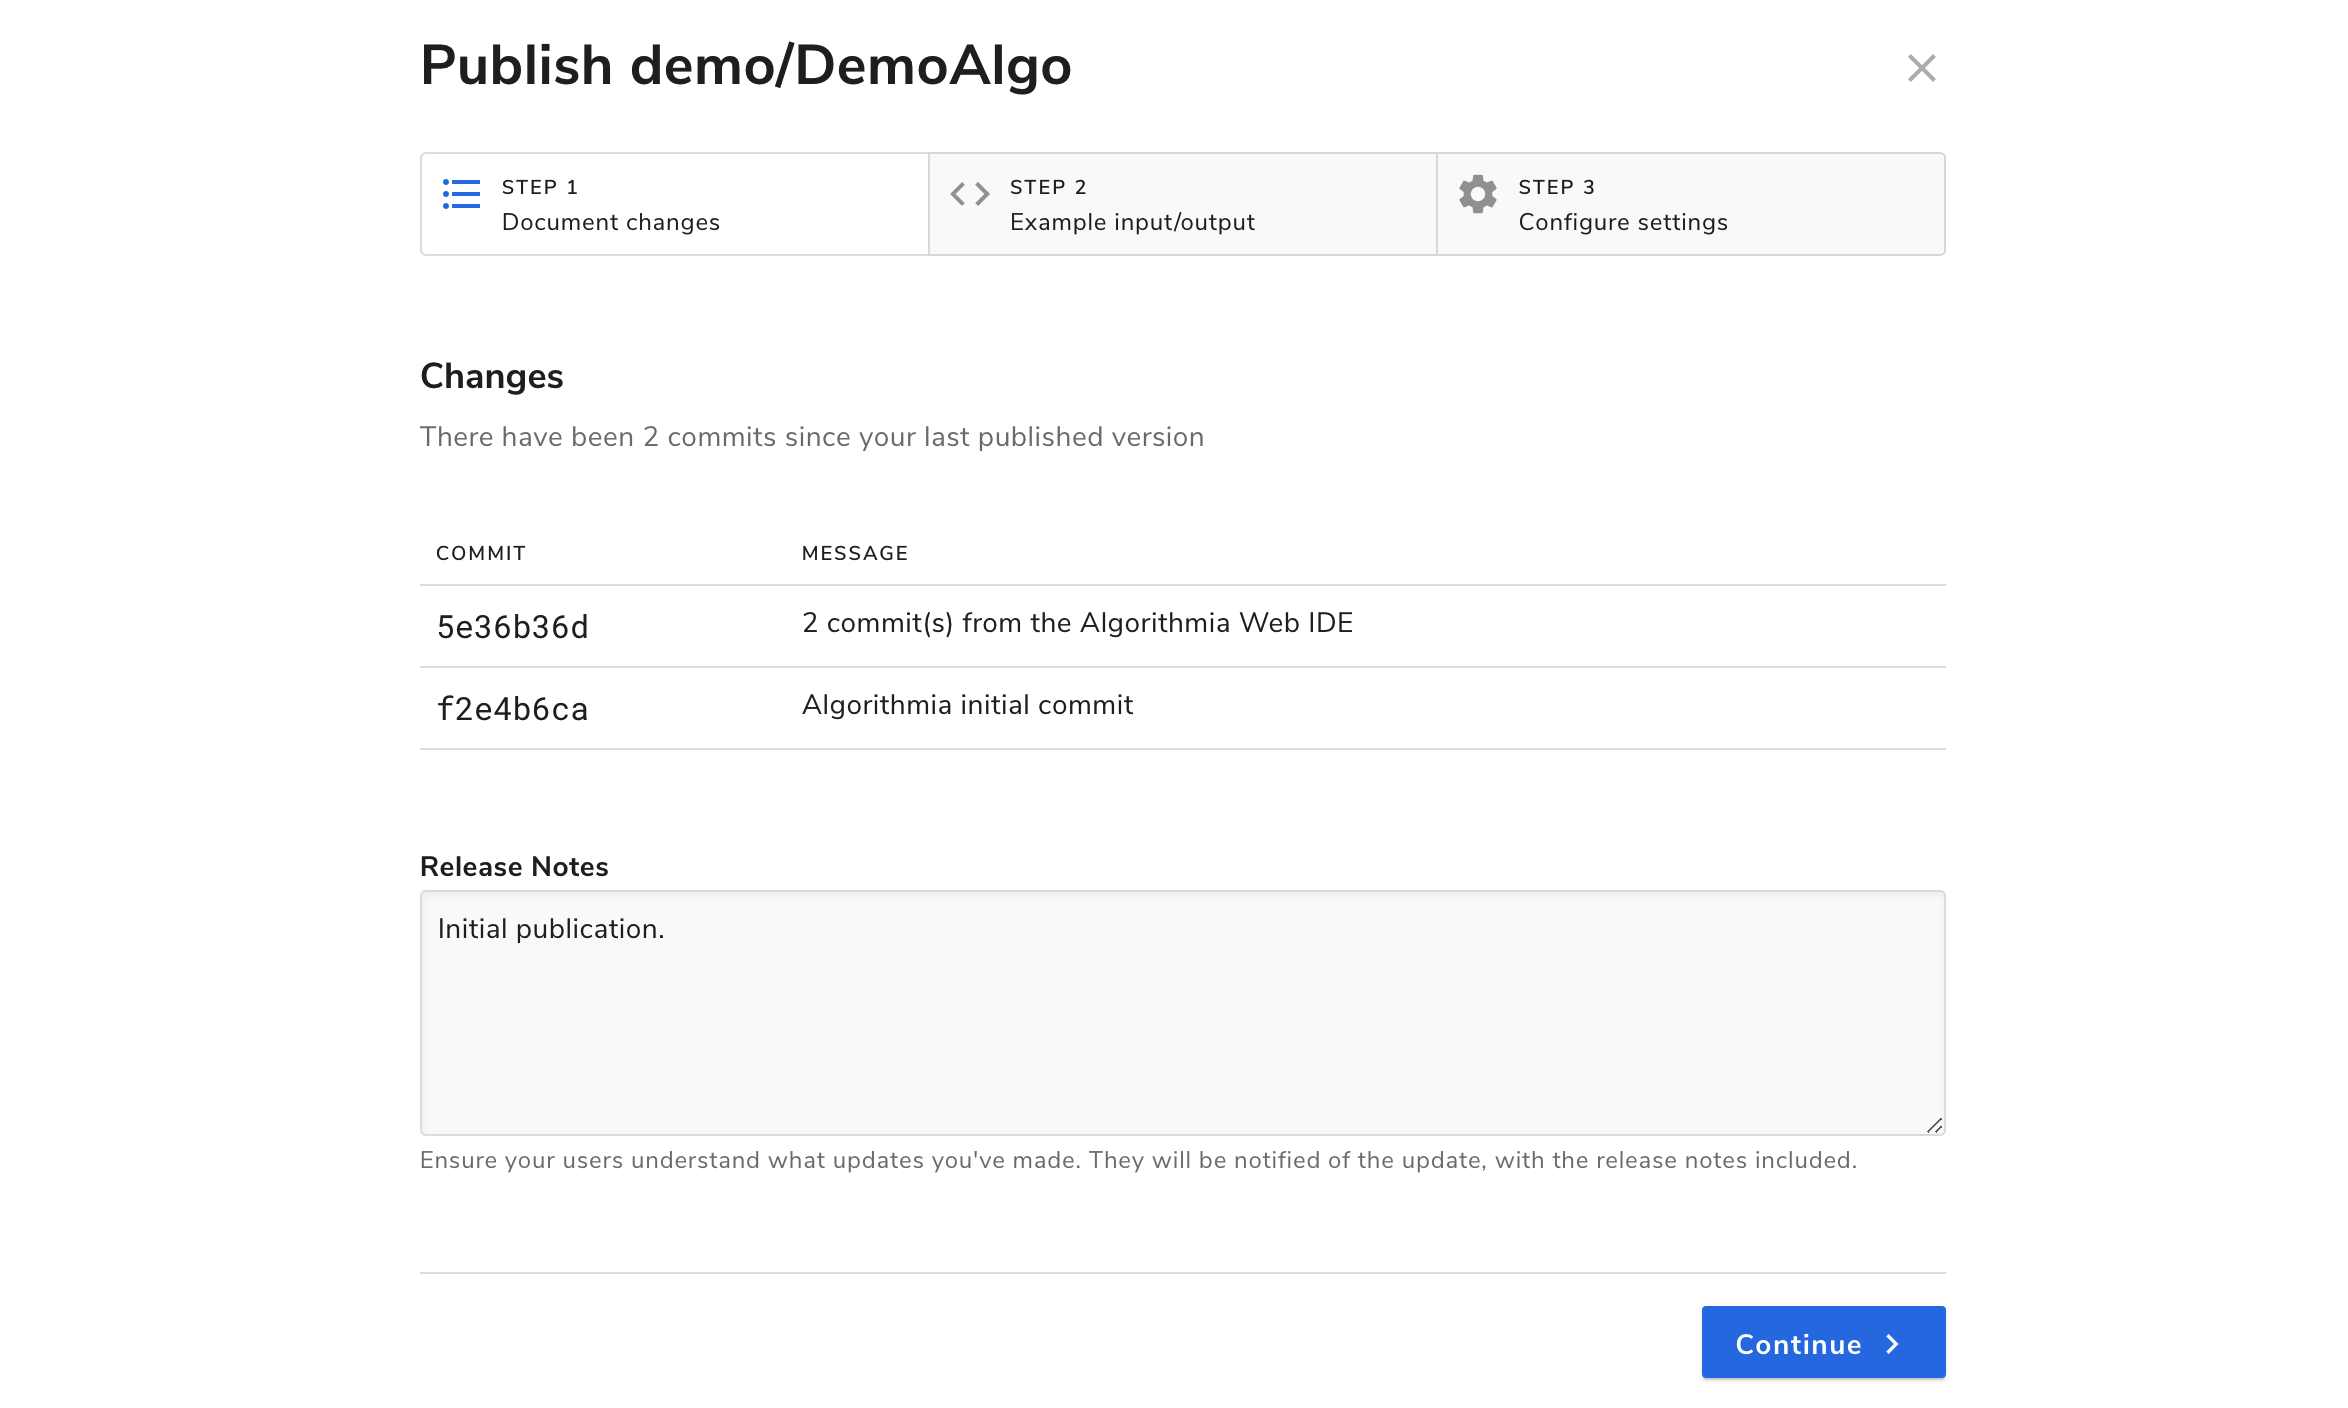
There are 3 steps to publishing an algorithm: documenting changes, adding example input and output, and configuring algorithm settings.
The Changes step shows you your commit history and allows you to add release notes. Go ahead and enter some example release notes like “Initial Hello World release”.
The Example Input/Output step is where you’ll enter sample input to be displayed on the algorithm’s home page, where other users will be able to test out your algorithm. Go ahead and enter your name in double quotes, or another short text string, and run the algorithm to ensure that it behaves as expected.
In the Configure Settings step you can select whether your algorithm will be publicly callable or for private use only. Under “Semantic Version” you can choose which kind of release characterizes your changes: Major, Minor, or Revision. Finally, you can enable the collection of metrics using Algorithmia Insights by checking the “Insights” box. For your simple algorithm here, you can leave the default options selected.
If you’re satisfied with your algorithm code, behavior, and settings, go ahead and hit “Publish”. Congratulations, you’re an algorithm developer!
Calling your algorithm
Once you’ve published your algorithm, you can call it via our API in just a few lines of code. Let’s first see what this looks like using cURL from the command line. To call your algorithm you’ll send a POST request to the following API endpoint, where ALGO_NAME is the name of the algorithm you just created, and ALGO_OWNER is your account name.
POST https://api.algorithmia.com/v1/algo/ALGO_OWNER/ALGO_NAMEThe algorithm you published above takes a string as input and returns a greeting addressed to that string. Try calling your algorithm from the command line using the following code, and sending in your name as input. The endpoint will be the same endpoint described above, with your algorithm-specific parameters. Make sure to replace API_KEY with a valid API key associated with your account.
curl -X POST https://api.algorithmia.com/v1/algo/ALGO_OWNER/ALGO_NAME \
       -H 'Content-Type: application/json' \
       -H 'Authorization: Simple API_KEY' \
-d '"Your Name"'You can also call your algorithm using any of our supported language clients, for example from within an app. To view the code for your language of choice, toggle the drop-down language option in the box below. Further language-specific guidance is available in our Client Guides.
import Algorithmia

input = "Your Name"
client = Algorithmia.client("API_KEY")
algo = client.algo("ALGO_OWNER/ALGO_NAME")
print(algo.pipe(input))
import com.algorithmia.*;
import com.algorithmia.algo.*;
String input = "Your Name"
AlgorithmiaClient client = Algorithmia.client("API_KEY");
Algorithm algo = client.algo("ALGO_OWNER/ALGO_NAME");
AlgoResponse result = algo.pipe(input);
System.out.println(result.asString());library(algorithmia)
input <- "Your Name"
client <- getAlgorithmiaClient("API_KEY")
algo <- client$algo("ALGO_OWNER/ALGO_NAME")
result <- algo$pipe(input)$result
print(result)var input = "Your Name";
Algorithmia.client("API_KEY")
.algo("ALGO_OWNER/ALGO_NAME")
.pipe(input)
.then(function(response) {
console.log(response);
});var input = "Your Name";
Algorithmia.client("API_KEY")
.algo("algo://ALGO_OWNER/ALGO_NAME")
.pipe(input)
.then(function(response) {
console.log(response.get());
});require 'algorithmia'
input = "Your Name"
client = Algorithmia.client("API_KEY")
algo = client.algo("ALGO_OWNER/ALGO_NAME")
response = algo.pipe(input).result
puts responseuse algorithmia::*;
let input = "Your Name";
let client = Algorithmia::client("API_KEY");
let algo = client.algo("ALGO_OWNER/ALGO_NAME");
let response = algo.pipe(input);
println!(response)import com.algorithmia._
import com.algorithmia.algo._
val input = "Your Name"
val client = Algorithmia.client("API_KEY")
val algo = client.algo("algo://ALGO_OWNER/ALGO_NAME")
val result = algo.pipeJson(input)
System.out.println(result.asString)import Algorithmia
let input = "Your Name";
let client = Algorithmia.client(simpleKey: "API_KEY")
let algo = client.algo(algoUri: "ALGO_OWNER/ALGO_NAME") { response, error in
print(response)
}import (
algorithmia "github.com/algorithmiaio/algorithmia-go"
)
input := "Your Name"
var client = algorithmia.NewClient("API_KEY")
algo, _ := client.Algo("algo://ALGO_OWNER/ALGO_NAME")
resp, _ := algo.Pipe(input)
response := resp.(*algorithmia.AlgoResponse)
fmt.Println(response.Result)using Algorithmia;
var input = "Your Name";
var client = new Client("API_KEY");
var algo = client.algo(client, "algo://ALGO_OWNER/ALGO_NAME");
var response = algo.pipe<string>(input);
System.Console.WriteLine(response.result.ToString());use LWP::UserAgent;
my $input = 'Your Name';
my $api_key = 'API_KEY';
my $req = HTTP::Request->new(POST => 'http://api.algorithmia.com/v1/algo/ALGO_OWNER/ALGO_NAME');
$req->header('content-type' => 'application/json');
$req->header('Authorization' => 'Simple '.$api_key);
$req->content($post_data);
my $ua = LWP::UserAgent->new;
my $resp = $ua->request($req);
if ($resp->is_success) {
print $resp->decoded_content;
} else {
print 'POST error: ', $resp->code, ': ', $resp->message;
}$input = 'Your Name';
$api_key = 'API_KEY';
$data_json = json_encode($input);
$ch = curl_init();
curl_setopt_array($ch, array(
CURLOPT_URL => 'https://api.algorithmia.com/v1/algo/ALGO_OWNER/ALGO_NAME',
CURLOPT_HTTPHEADER => array(
'Content-Type: application/json',
'Authorization: Simple ' . $api_key,
'Content-Length: ' . strlen($data_json)
),
CURLOPT_POSTFIELDS => $data_json,
CURLOPT_RETURNTRANSFER => true,
CURLOPT_POST => true
));
$response_json = curl_exec($ch);
curl_close($ch);
$response = json_decode($response_json);
if($response->error) {
print('ERROR: ');
print_r($response->error);
} else {
print_r($response->result);
}Quick Reference: Local Development vs. Web IDE
Every developer has a different workflow, and Algorithmia is built with flexibility in mind. When you’re developing on our platform, you may find that you use your local environment for the majority of your work but that sometimes it’s convenient to jump into the Web IDE, for example to make minor changes.
Both local and Web IDE development are backed by Git version control, so you can use a normal Git workflow as you would with any other remote repositories. Note that, just like in any other distributed version control scenario, if you use both a local environment and the Web IDE to make changes in the same file(s) at the same time, you may end up with merge conflicts. If you do commit and push code locally via Git while the Web IDE is open to the same repository, simply reload the page to view the latest version.
The following table provides a quick-reference comparison for understanding how algorithm management actions completed using the local workflow map to actions in the browser UI.
| Action | Git and/or Python Client | Browser UI/Web IDE |
|---|---|---|
| Create an algorithm | algo.create(...) |
Create New button → Algorithm button |
| Save an algorithm change without a commit | (“save/write file” command) | (no equivalent functionality) |
| Save an algorithm change with a commit | git commit |
Save button |
| Build an algorithm | algo.compile() / git push |
Build button (also creates a commit) |
| Publish an algorithm | algo.publish(...) |
Publish button |
| Call an algorithm | algo.pipe(...) |
(input directly in test console) |
Next steps
Now that you’ve published your first simple algorithm on the platform, you’re empowered to start developing much more complex and useful algorithms. You can write them from scratch, adopt and modify open-source algorithms, and even pipeline multiple algorithms together. Once published, your algorithms will become versioned API endpoints that you can consume from external applications with just a few lines of code!
Language guides
Now that you know the basics, you can check out the Language Guides to learn how to write algorithms in whichever language you prefer; we support R, Python, Rust, Ruby, Java, Scala, and JavaScript.
Connecting to data
As you saw in this guide, you can create simple algorithms that don’t read or write any data to disk. However, most algorithms you develop will need to be able to interact with some sort of data source.
As an integration-first platform, we encourage you to connect to whatever data source(s) you’re already using. We also enable you to host data directly on our platform for lower-latency access, and we even have several native integrations with cloud-hosted data platforms.
See our Data API docs and our Developer Center data docs to get started connecting to data sources.