 Android (Basic)
In this post, we’ll walk through how to build a very simple Android app that uses the Algorithmia API.
The full sample code can be found in the GitHub repo: FORK
You can either clone the repo directly and follow along with the README instructions to see the fully complete app, or you can follow the tutorial below to build your first Android app with Algorithmia!
Getting Started
First things first, let’s create a new app in Android Studio.
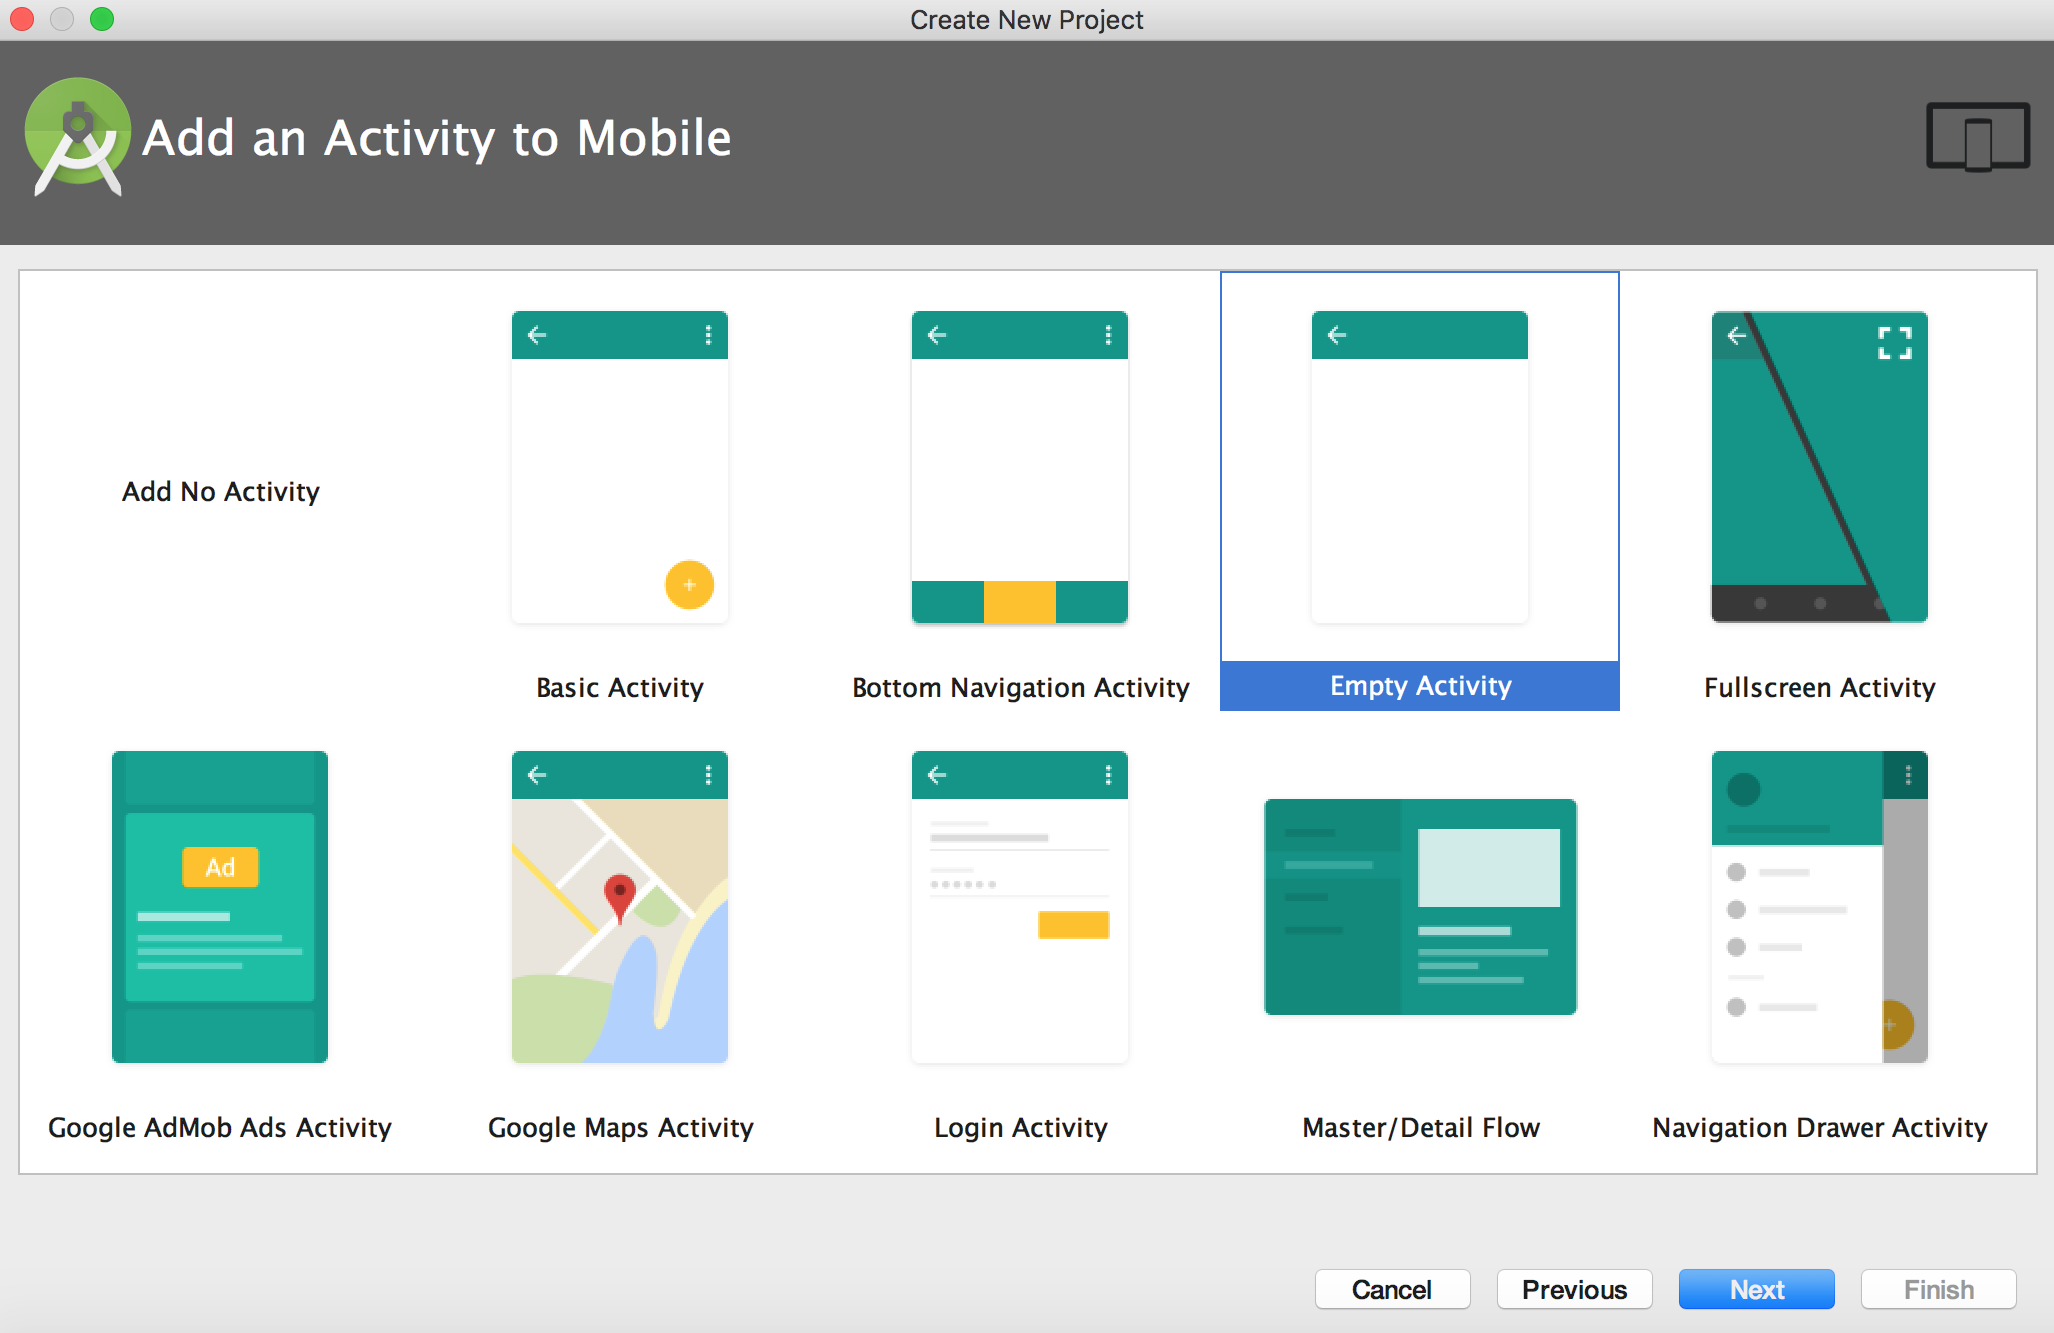
Select New Project and follow along with the New Project wizard. You can feel free to give your new app any name you like. Then, select your target devices and when prompted with the Add Activity screen, select “Empty Activity”:
Since our app is just a simple example app, we’ll use put our code in MainActivity.java. But first, we need to do a little bit more set up.
Settings, Permissions, & API Key
Follow the following 3 steps below to make sure you have the dependencies, permissions, and API key set as needed.
Step One: Dependencies
Add the Algorithmia client to your app in the dependencies section of app/build.gradle, like so:
dependencies {
    ...
    compile "com.algorithmia:algorithmia-android:1.0.1"
    ...
}
Step Two: Internet Permissions
To ensure that we can access the Internet from our app, we’ll specify this permission in AndroidManifest.xml:
<uses-permission android:name="android.permission.INTERNET" />Step Three: API Key
In strings.xml, replace the demo API key with your API key, which can be found under the credentials section of your profile on the Algorithmia website.
<resources>
    <string name="app_name">Android Sample</string>
    <string name="algorithmia_api_key">YOUR_API_KEY</string>
</resources>
Make sure you’ve replaced YOUR_API_KEY with the API key under your account so that the Algorithmia client can authenticate!
Adding views to the app
We’ll need some views that we can connect to our code. Under res/layout/activity_main.xml add the following TextViews, EditText fields, and Button. You can also do this through the visual editor, but since we just have a few simple things to add to the layout we’ll add them to the xml:
<TextView
    android:layout_width="wrap_content"
    android:layout_height="wrap_content"
    android:text="Algorithm" />

<EditText
    android:id="@+id/algo_url"
    android:layout_width="match_parent"
    android:layout_height="wrap_content"
    android:text="demo/hello"/>

<TextView
    android:layout_width="wrap_content"
    android:layout_height="wrap_content"
    android:text="Algorithm Input" />

<EditText
    android:id="@+id/algo_input"
    android:layout_width="match_parent"
    android:layout_height="wrap_content"
    android:text="foo"/>

<Button
    android:id="@+id/algo_run"
    android:layout_width="wrap_content"
    android:layout_height="wrap_content"
    android:layout_marginBottom="20dp"
    android:onClick="onClickRun"
    android:text="Run"/>

<TextView
    android:layout_width="wrap_content"
    android:layout_height="wrap_content"
    android:text="Algorithm Output" />

<TextView
    android:id="@+id/algo_output"
    android:layout_width="wrap_content"
    android:layout_height="wrap_content" />
Let’s code!
To make our sample app run, we’ll need to do four things: first, we’ll need to add a function that gets called when the button is tapped, we’ll need to add in an async task, make the Algorithmia API call, and finally update the UI with the results.
Let’s start by getting references to the views. Add the references at the start of the public class, then inside of the onCreate method make sure you set them to the views with their ids:
public class MainActivity extends AppCompatActivity {
  private EditText algoUrl;
  private EditText algoInput;
  private TextView algoOutput;

    @Override
    protected void onCreate(Bundle savedInstanceState) {
      super.onCreate(savedInstanceState);
      setContentView(R.layout.activity_main);

      // Find views
      algoUrl = (EditText) findViewById(R.id.algo_url);
      algoInput = (EditText) findViewById(R.id.algo_input);
      algoOutput = (TextView) findViewById(R.id.algo_output);
    }
}
If you noticed when we added the views to the app, we already set the button to handle the onClick event with this line: android:onClick="onClickRun". Android Studio will complain that this method doesn’t exist, so let’s create it now. We’ll also have grab the values of the EditText views so we can work with them.
public void onClickRun(View v) {
  final String algo = algoUrl.getText().toString();
  final String input = algoInput.getText().toString();
}
Next we’ll want to make sure that our API call happens inside of an AsyncTask. Set up the AsyncTask:
public void onClickRun(View v) {
  final String algo = algoUrl.getText().toString();
  final String input = algoInput.getText().toString();
  new AsyncTask<Void,Void,AlgoResponse>() {
    @Override
    protected AlgoResponse doInBackground(Void... params) {
      try {
        // make API call
      } catch (APIException e) {
       // handle exception
      }
    }
    @Override
    protected void onPostExecute(AlgoResponse response) {
        if(response == null) {
        } else if(response.isSuccess()) {
            // handle successful response
        } else {
           // handle failure message
        }
    }
  }.execute();
}
Let’s start by making the filling out the try
and catch. We want to first make the API call. Be sure to pass in the API key from the strings resource that we set before:
protected AlgoResponse doInBackground(Void... params) {
  try {
    return Algorithmia.client(getString(R.string.algorithmia_api_key)).algo(algo).pipe(input);
  } catch (APIException e) {
    return new AlgoFailure(new AlgorithmException(e));
  }
}
Notice that we are catching the API exception and creating a new Algorithmia Exception from it. We do this so that we can update the UI with the exception message in the onPostExecute method. Let’s do that now!
@Override
  protected void onPostExecute(AlgoResponse response) {
    if(response == null) {
      algoOutput.setText("Algorithm Error: network connection failed");
    } else if(response.isSuccess()) {
      AlgoSuccess success = (AlgoSuccess) response;
      algoOutput.setText(success.asJsonString());
    } else {
      AlgoFailure failure = (AlgoFailure) response;
      algoOutput.setText("Algorithm Error: " + failure.error);
    }
  }
What the above code does is set the algoOutput text view to display the results of the call. If the response is null, we’ve set the output to show a generic “network connection failed” message. Following this, we’ve got a check on line 5 to see if the condition is successful, and if so we’ll set the text to the success response. Of course, we’ll also need to handle the failures, which you’ll see in the final else of the method on lines 8-10.
You can find the full code for MainActivity.java
on GitHub. Double check that your code matches the code in the repo!
When you run the app in the emulator, you’ll see this:
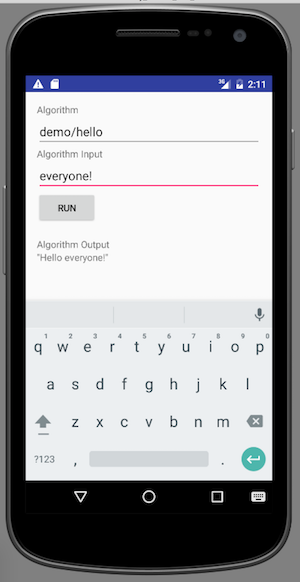
Next Steps
Now that you’ve got your first Algorithmia Android app running, try replacing the demo/Hello algorithm with another that you find on the marketplace. Try something like anowell/pinky or diego/RetrieveTweetsWithKeyword. Then make sure the input you provide to your new algorithm matches the expected input, and hit run!
Integrating Algorithmia into Android is an easy and convenient way to leverage algorithms, so now that you’ve got the basic API integration down, you can follow this pattern to start hacking away at your own apps!