 Zapier
Zapier lets you create workflows, called Zaps, which are triggered by one provider – for example, a file being added to Dropbox or S3 – and cause an action to performed elsewhere, such as sending a message in GMail or Slack.
Algorithmia plays nicely with Zapier, allowing you to easily trigger Algorithms from Zapier (for example, monitoring an S3 bucket for new images, then calling ColorfulImageColorization to create colorized versions of them), or add Machine Learning into the middle of a larger workflow (such as monitoring Zendesk for messages, passing them through KeywordExtraction to figure out which topics are most relevant, then sending text messages to oncall support staff for the most important ones).
To begin, head to Zapier.com and click “make a zap”. Pick your Trigger App, and configure it.
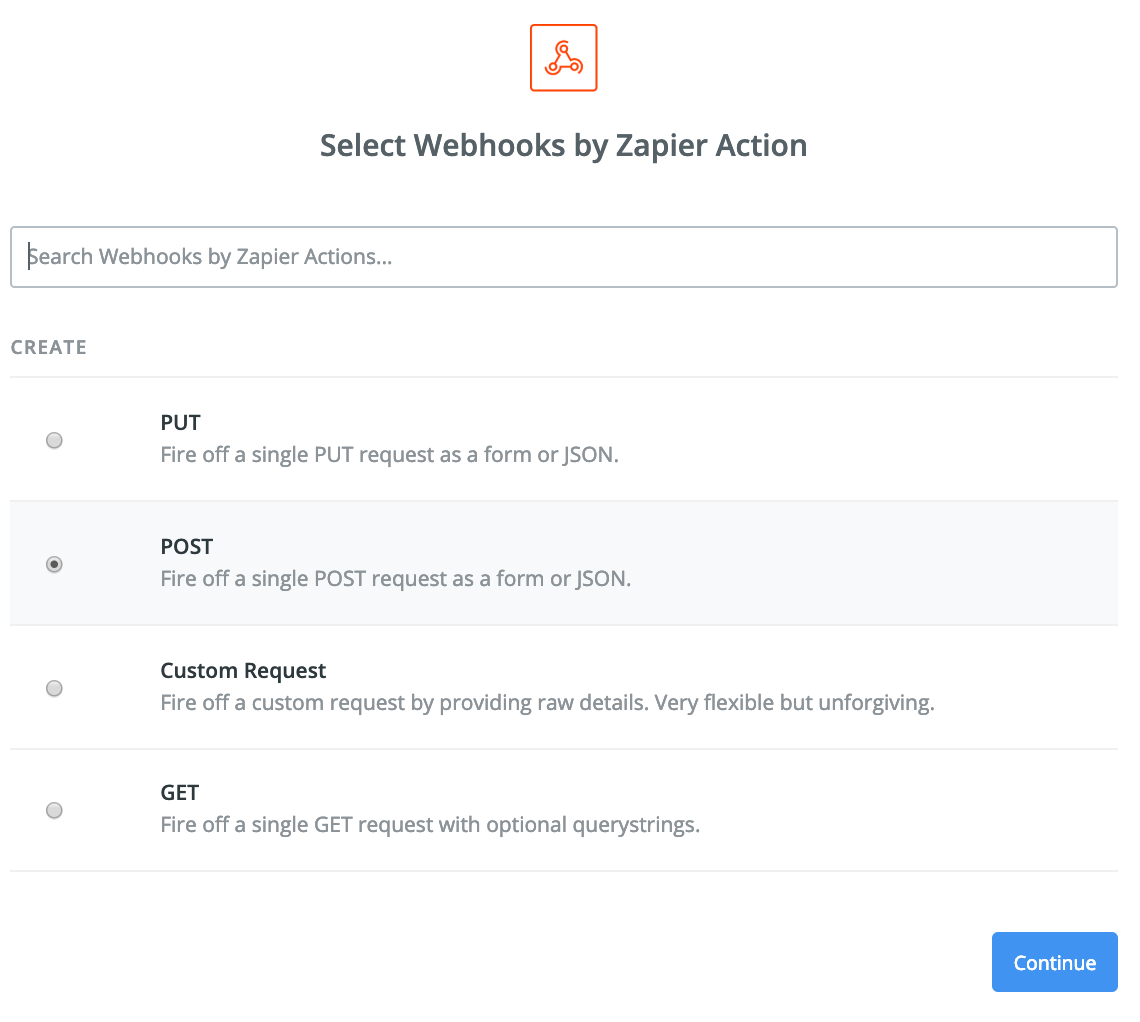
Next, click Add a Step, then search for and select “Webhooks”. Pick “POST”, and click Continue.
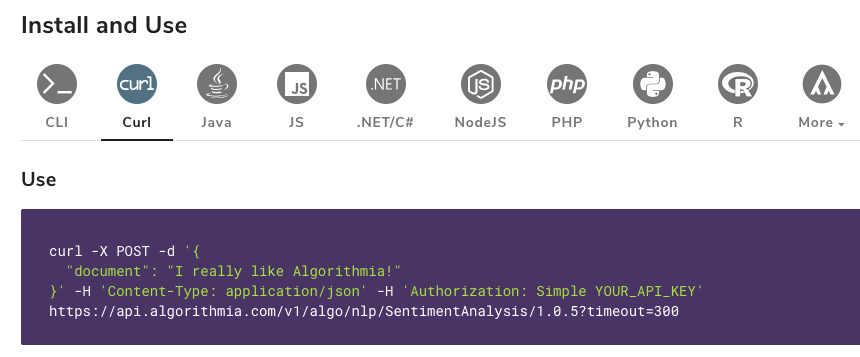
Now, head to the Algorithm directory and find an Algorithm you’d like to run. Under the “Install and Use” section, click “Curl”: this codesample has all the info you’ll need to configure Zapier.
Here’s what it looks like for nlp/SentimentAnalysis: note the URL (https://api.algorithmia.com/v1/algo/nlp/SentimentAnalysis/1.0.5?timeout=300), the input data ({“document”: “I really like Algorithmia!”}), and the Authorization header (Authorization: Simple YOUR_API_KEY)
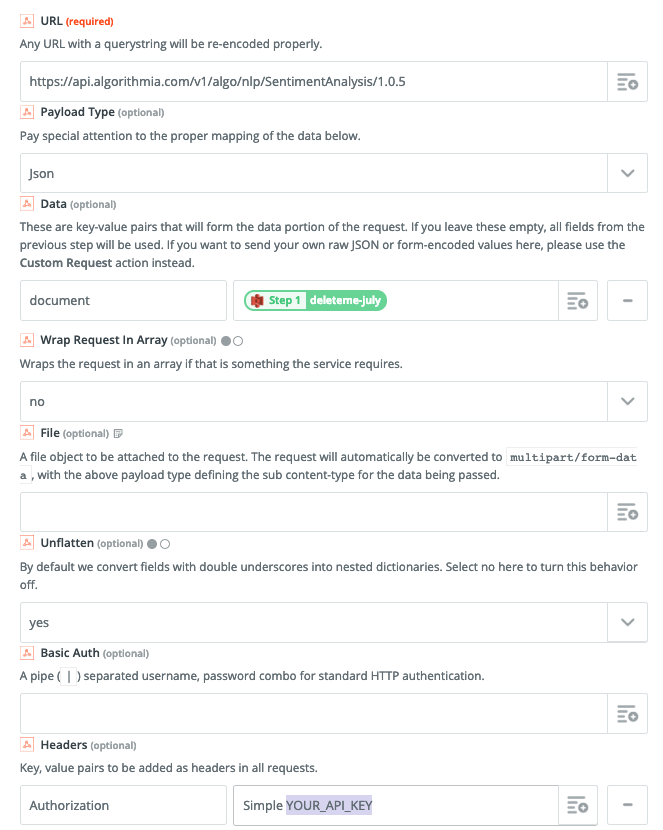
You’ll use these properties to fill out the settings for the Webhook. Replace URL with the URL from the curl command. Pick “json” as the Payload type, then add fields to Data so they match the input data for your Algorithm (you’ll generally use a field from the Zapier Trigger as one of the Values here). Skip the next few fields, then add a Header called “Authorization”, with the value “Simple YOUR_API_KEY” (this api key can be found in your Algorithmia account settings).
Hit “Continue” and test out your webhook. When it succeeds, click “Finish”, give your Zap a name, and activate your new ML-powered Zapier workflow! Or, if you want to use the output of the Algorithm in another step, just click “Add a step” on the left to keep adding more to your Zap.