 TensorFlow
Welcome to deploying your pre-trained Tensorflow model on Algorithmia!
Currently we support tensorflow-gpu up to version 2.4.
Note: this guide uses the web UI to create and deploy your Algorithm. If you prefer a code-only approach to deployment, review Algorithm Management after reading this guide.
Table of Contents
Prerequisites
Before you get started deploying your pre-trained model on Algorithmia, there are a few things you’ll want to do first:
Save your Pre-Trained Model
You’ll want to do the training and saving of your model on your local machine, or the platform you’re using for training, before you deploy it to production on the Algorithmia platform.
After training your Tensorflow model, you’ll need to save it, along with its assets and variables.
There are a few ways to save models in different versions of Tensorflow, but below, we’ll use the SavedModel method that works with multiple versions.
Because of how Tensorflow doesn’t save the entire graph architecture when using saver.save & saver.restore (which require the same Tensorflow global context to be used), you’ll need to use tf.saved_model.Builder to save your TF model.
from tensorflow.examples.tutorials.mnist import input_data
import tensorflow as tf
import shutil

# Pulls data from a folder in your local directory data/MNIST
mnist = input_data.read_data_sets("data/MNIST/", one_hot=True)

def preprocessing(save_directory):
    """
    Read data from mnist dataset.
    Every data point has two parts: image (xs) and label (ys).
    """
    x = tf.placeholder(tf.float32, [None, 784])

    # Weights and biases for model
    W = tf.Variable(tf.zeros([784, 10]))
    b = tf.Variable(tf.zeros([10]))

    # Implement model.
    y = tf.nn.softmax(tf.matmul(x, W) + b)

    # Add new placeholder for correct answers
    y_ = tf.placeholder(tf.float32, [None, 10])
    # Implement cross-entropy to meausre the inefficiency of our
    # predictions
    cross_entropy = tf.reduce_mean(-tf.reduce_sum(y_ *
                                                  tf.log(y), reduction_indices=[1]))
    train_step = tf.train.GradientDescentOptimizer(
        0.5).minimize(cross_entropy)

    # Initialize variables we created
    init = tf.initialize_all_variables()

    return save_model(train_step, init, x, y_, save_directory, y)

def save_model(train_step, init, x, y_, save_directory, y):
    """
    Launch model, initialize variables and save variables to disk after
    training
    """
    try:
        shutil.rmtree(save_directory)
    except:
        pass

    builder = tf.saved_model.builder.SavedModelBuilder(save_directory)
    with tf.Session() as sess:
        sess.run(init)
        for i in range(1000):
            batch_xs, batch_ys = mnist.train.next_batch(100)
            sess.run(train_step, feed_dict={x: batch_xs, y_: batch_ys})

        # We define our input tensors by name
        inputs = {"Placeholder": tf.saved_model.utils.build_tensor_info(x)}

        #  We also define our output tensors
        outputs = {"Softmax": tf.saved_model.utils.build_tensor_info(y),
                   "Placeholder_1": tf.saved_model.utils.build_tensor_info(y_)}
        # Then we create a SignatureDef
        signature = tf.saved_model.signature_def_utils.build_signature_def(
            inputs=inputs,
            outputs=outputs,
            method_name=tf.saved_model.signature_constants.PREDICT_METHOD_NAME
        )

        builder.add_meta_graph_and_variables(sess,
                                             [tf.saved_model.tag_constants.SERVING],
                                             signature_def_map={'foo': signature})

        print("Model saved in file: {0}".format(save_directory))
        # argmax gives you the index of the highest entry in a tensor along an
        # axis
        correct_prediction = tf.equal(tf.argmax(y, 1), tf.argmax(y_, 1))
        # Cast floating points to take mean
        calculate_accuracy = tf.reduce_mean(tf.cast(correct_prediction, tf.float32))
        accuracy = sess.run(calculate_accuracy, feed_dict={
            x: mnist.test.images, y_: mnist.test.labels})
        print("accuracy before serialization: {}".format(accuracy))
        builder.save()
In the above code, the Manual Builder API is used to save your graph using a MetaGraph. That way all of the graph and its variables, assets, and signatures will be saved as a protocol buffer. Note that the signature is the set of inputs and outputs from your graph.
Now that you’ve trained and saved your Tensorflow model elsewhere, we’ll deploy it on Algorithmia.
Create a Data Collection
Host your data where you want and serve it to your model with Algorithmia’s Data API.
In this guide we’ll use Algorithmia’s Hosted Data Collection, but you can host it in S3 or Dropbox as well. Alternatively, if your data lies in a database, check out how we connected to a DynamoDB database.
First, you’ll want to create a data collection to host your graph and variables.
-
Log into your Algorithmia account and create a data collection via the Data Collections page.
-
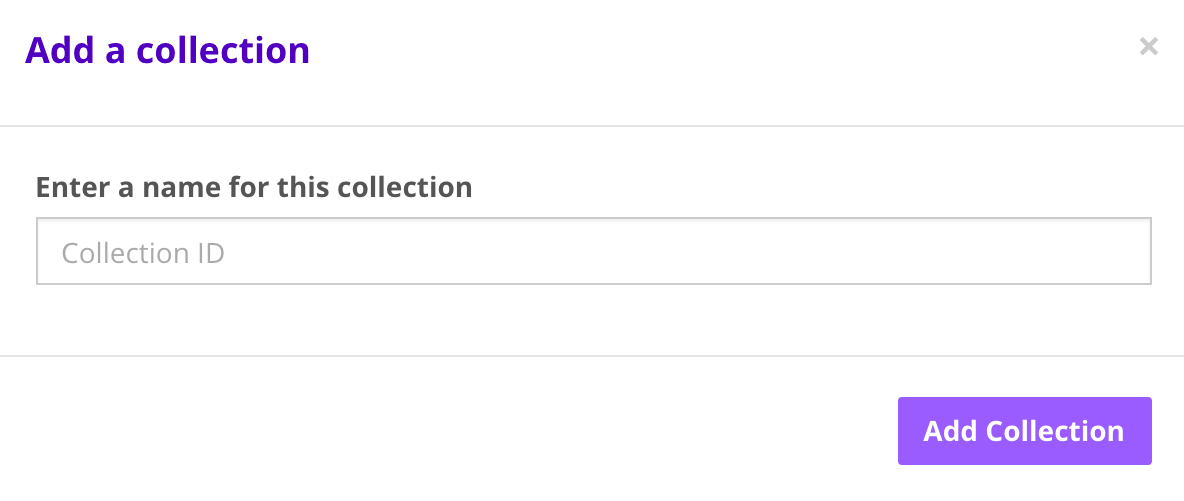
Click on “Add Collection” under the “My Collections” section.
-
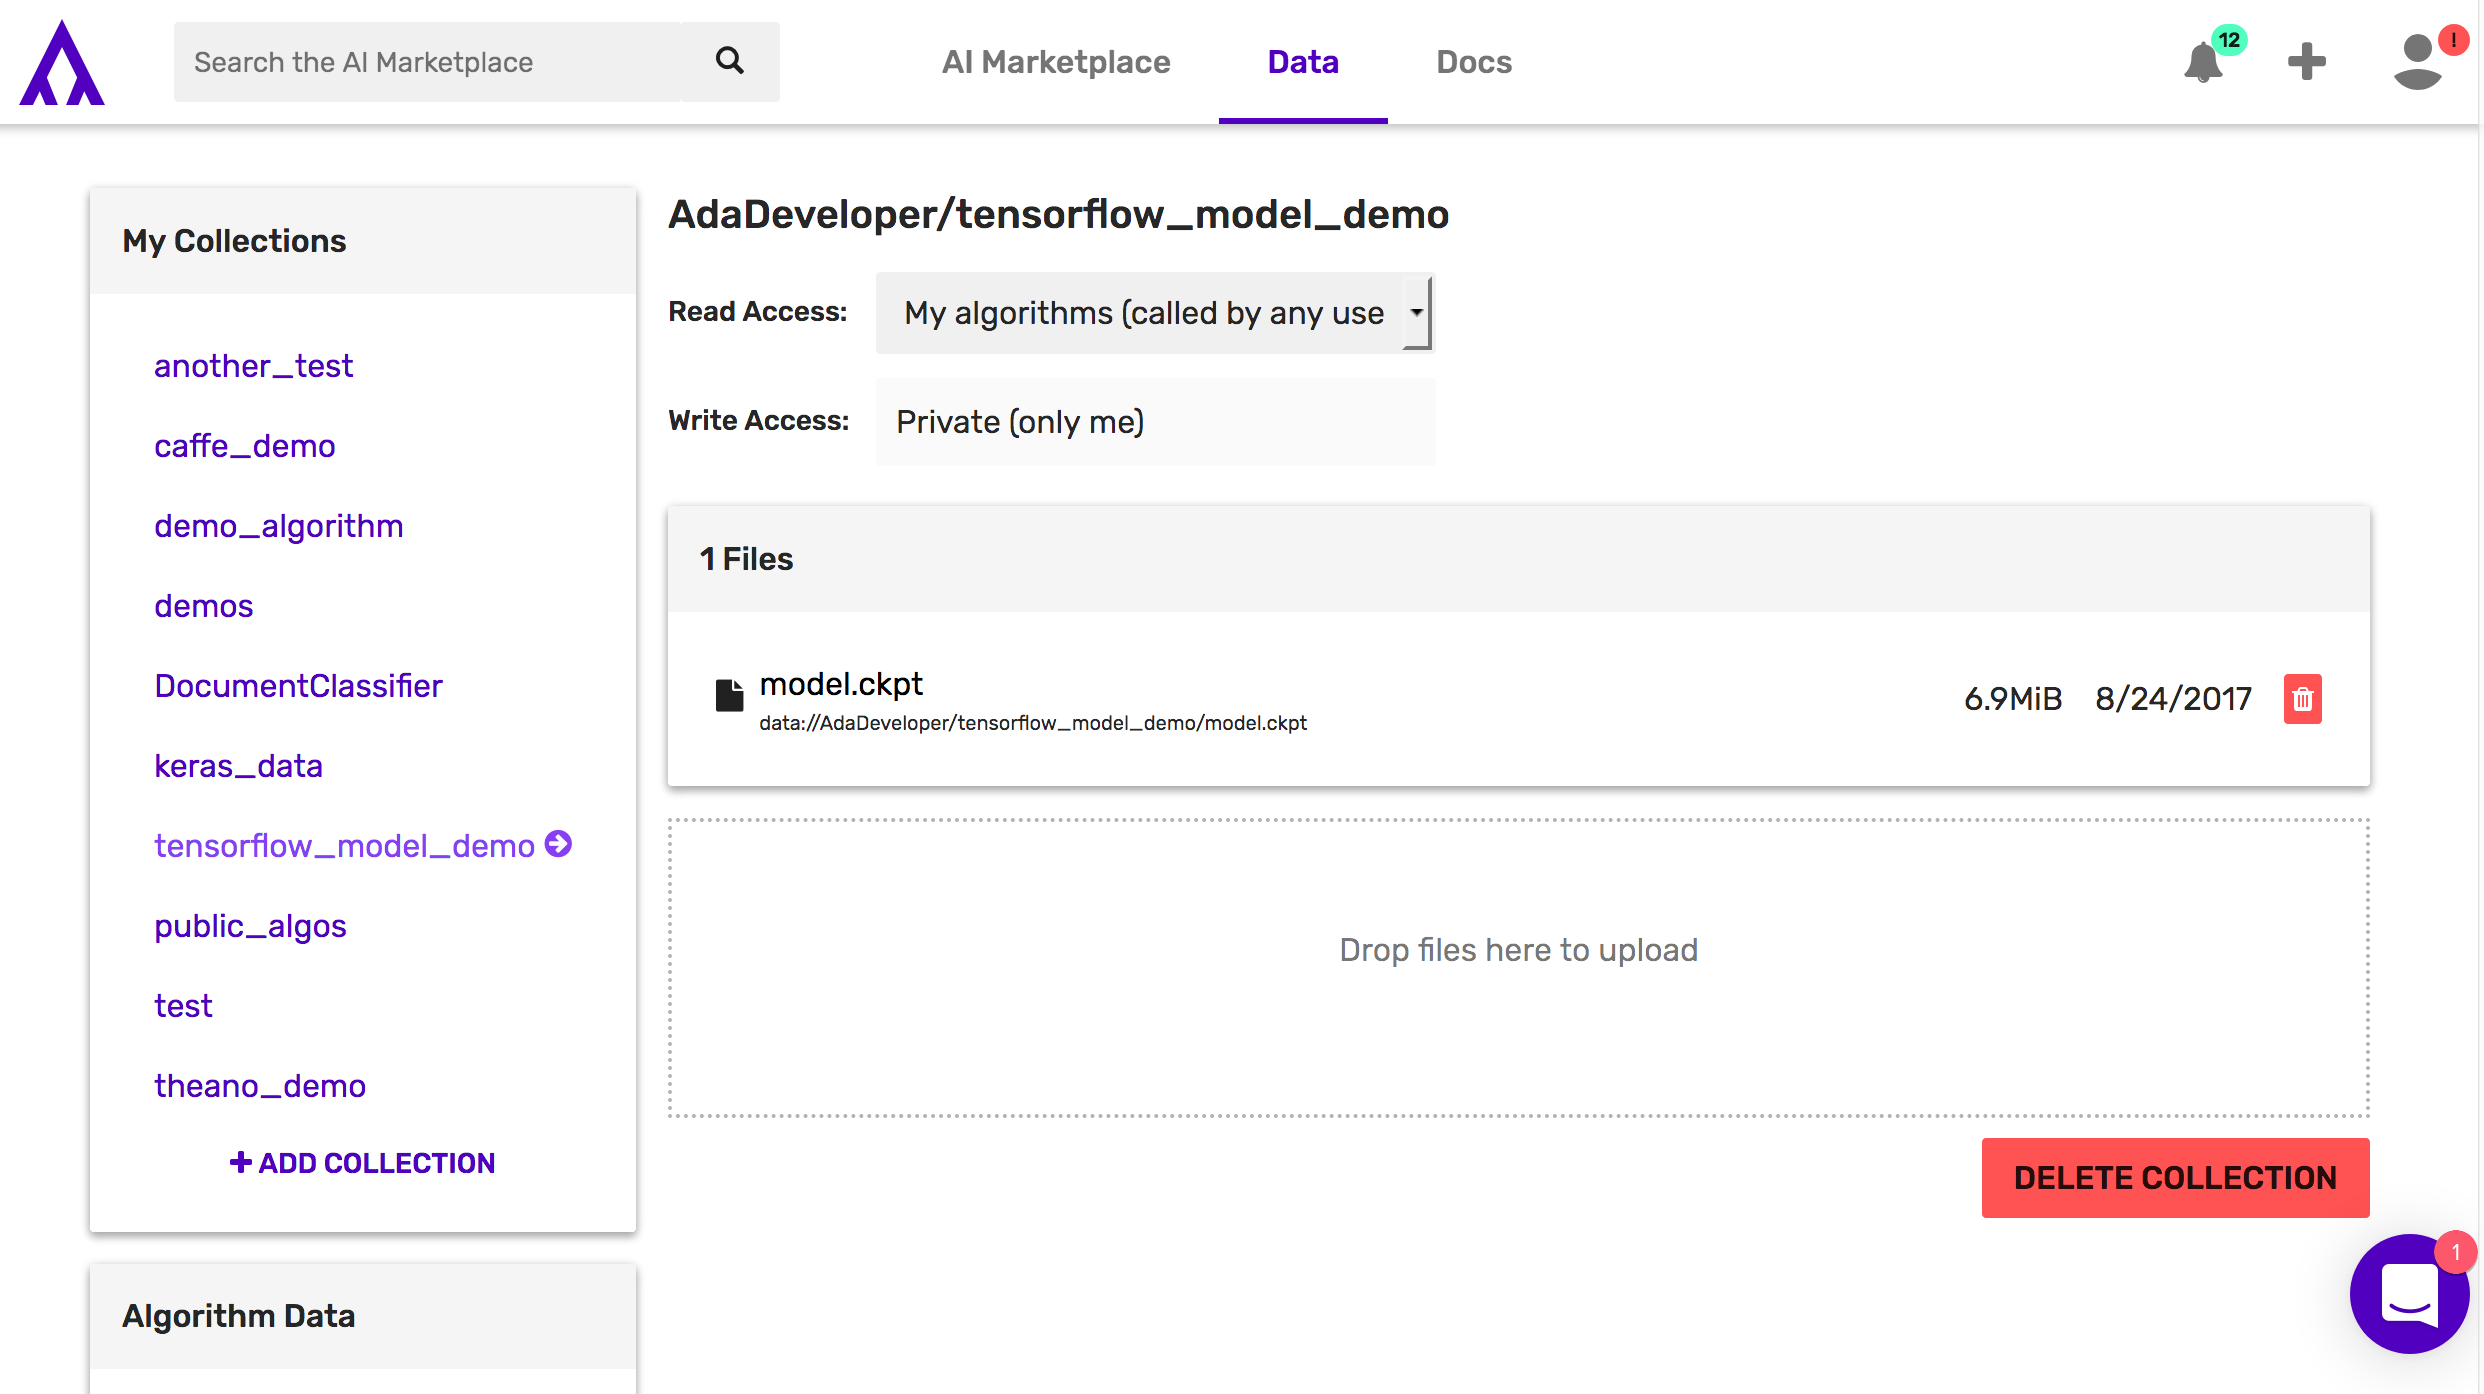
After you create your collection you can set the read and write access on your data collection.
For more information check out: Data Collection Types.
Note, that you can also use the Data API to create data collections and upload files.
Host Your Model File
Next, upload your Tensorflow variables and graph to your newly created data collection. They should be in a .zip file or .gzip, although note our examples show using zip format so you’ll need to change the code in your main model file in the function extract_model() to extract your gzip accordingly or simply save your model as a .zip file.
-
Load model by clicking box “Drop files here to upload”
-
Note the path to your data collection and the zip folder: data://user_name/collections_name/model.zip
Create your Algorithm
Hopefully you’ve already followed along with the Getting Started Guide for algorithm development. If not, you might want to check it out in order to understand the various permission types, how to enable a GPU environment, and use the CLI.
Note, that for this guide we are showing a model meant to run on a GPU enabled environment. To run the same model on CPUs check out this code sample: Tensorflow MNIST CPU Demo
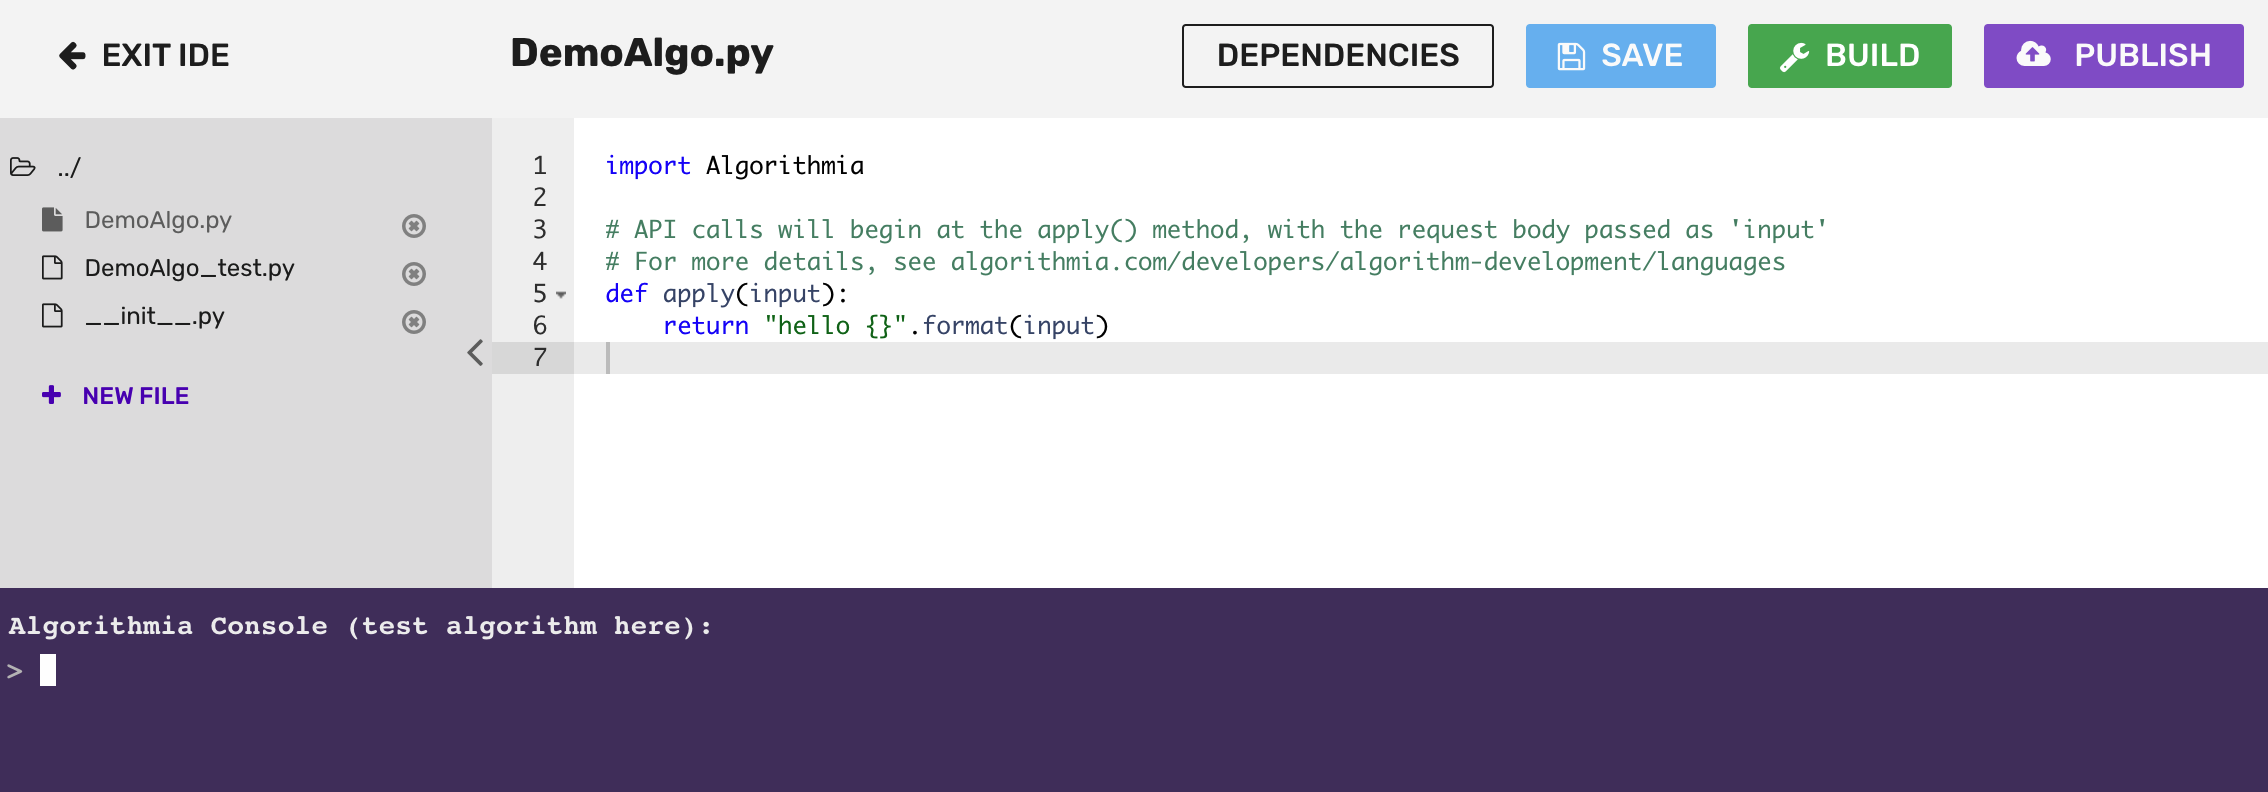
Once you’ve gone through the Getting Started Guide, you’ll notice that when you’ve created your algorithm, there is boilerplate code in the editor that returns “Hello” and whatever you input to the console.
The main thing to note about the algorithm is that it’s wrapped in the apply() function.
The apply() function defines the input point of the algorithm. We use the apply() function in order to make different algorithms standardized. This makes them easily chained and helps authors think about designing their algorithms in a way that makes them easy to leverage and predictable for end users.
Go ahead and remove the boilerplate code below that’s inside the apply() function on line 6, but leave the apply() function intact:
Set your Dependencies
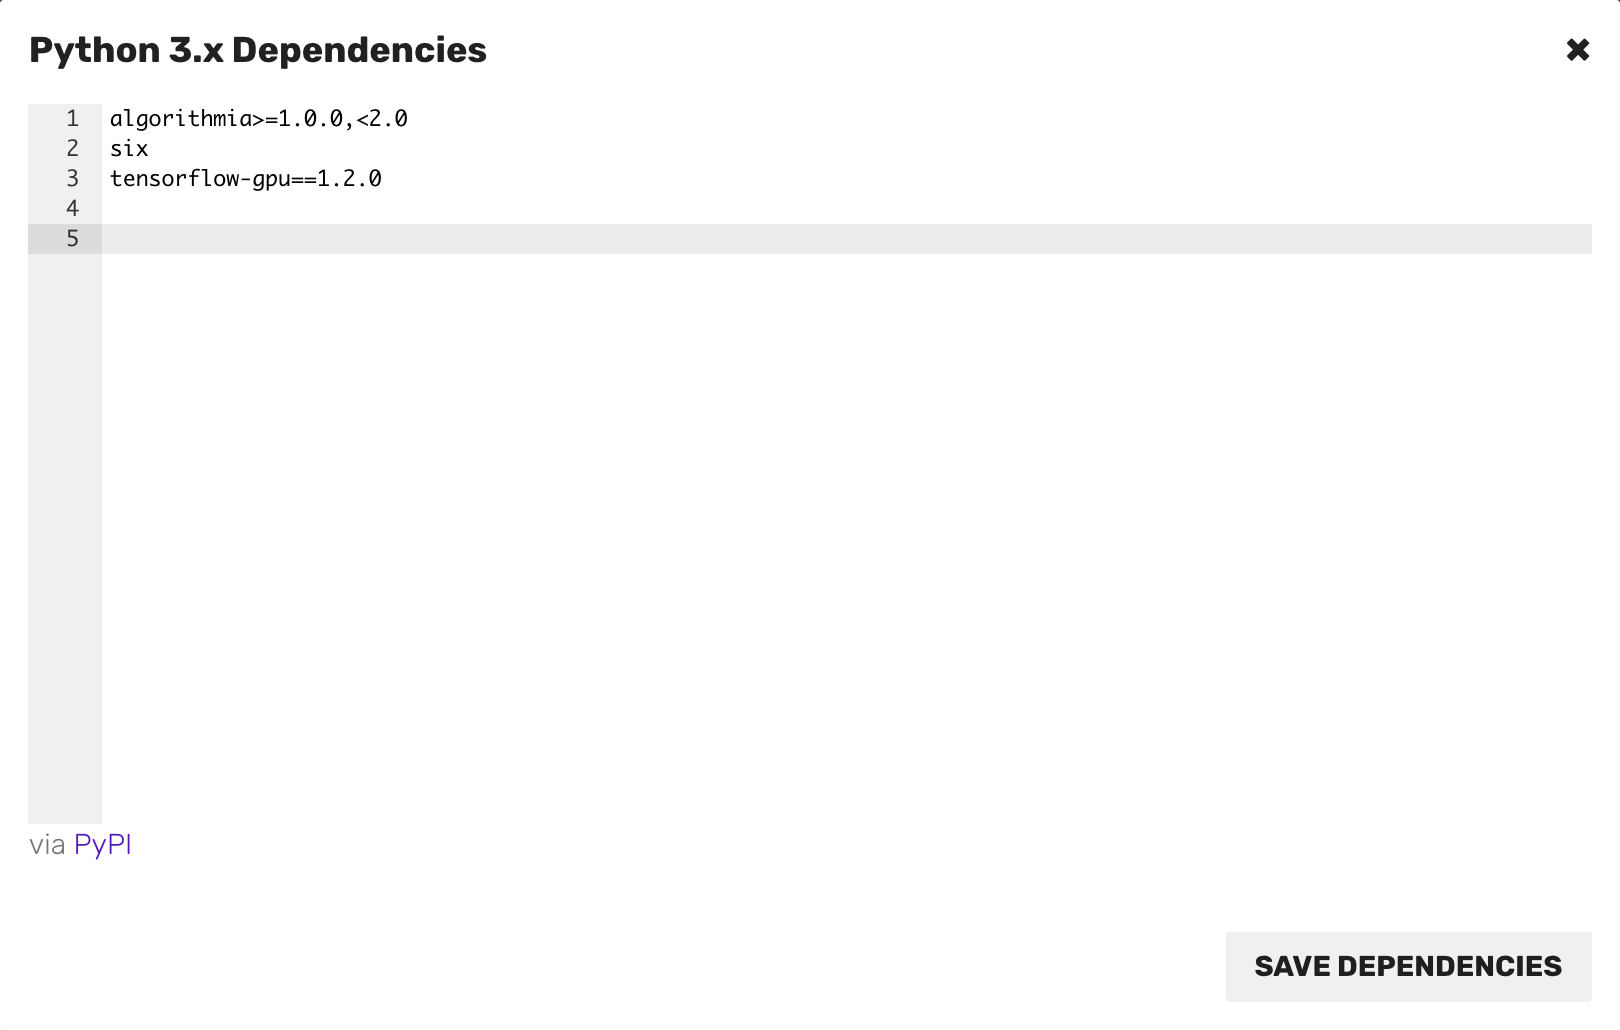
Now is the time to set your dependencies that your model relies on.
- Click on the “Dependencies” button at the top right of the UI and list your packages under the required ones already listed and click “Save Dependencies” on the bottom right corner.
Load your Model
Now that you’ve seen how to save your model using SavedModelBuilder, you can load your model using the Algorithmia IDE.
When you load your model, our recommendation is to preload your model in a separate function external to the apply() function.
This is because when a model is first loaded it can take time to load depending on the file size.
Then, with all subsequent calls only the apply() function gets called which will be much faster since your model is already loaded.
If you are authoring an algorithm, avoid using the ‘.my’ pseudonym in the source code. When the algorithm is executed, ‘.my’ will be interpreted as the user name of the user who called the algorithm, rather than the author’s user name.
Note that you always want to create valid JSON input and output in your algorithm. For examples see the Algorithm Development Guides.
Using the SavedModel Method
This is where we’ll show how to deploy your saved model to make predictions on the sample data.
The following code sample is adapted from MNIST for Beginners tutorial from Tensorflow.
If you want to follow along, you can add the MNIST data files to your data collection, but make sure you update the username and path to match your own.
You will also need the file in the Tensorflow Demo GPU called loadmnistdata.py shown here to deal with unpacking the mnist files:
"""
Functions to handle MNIST data extraction and loading

Adopted from https://github.com/tensorflow/tensorflow/blob/v0.6.0/tensorflow/examples/tutorials/mnist/input_data.py
"""

import struct
import gzip
import numpy as np

def extract_images(filename, img):
    try:
        with gzip.open(filename) as gz:
            n = struct.unpack('I', gz.read(4))
            # Read magic number.
            if n[0] != 0x3080000:
                raise Exception('Invalid file: unexpected magic number.')
            # Read number of entries.
            n = struct.unpack('>I', gz.read(4))[0]
            if n != img:
                raise Exception('Invalid file: expected {0} entries.'.format(img))
            crow = struct.unpack('>I', gz.read(4))[0]
            ccol = struct.unpack('>I', gz.read(4))[0]
            if crow != 28 or ccol != 28:
                raise Exception('Invalid file: expected 28 rows/cols per image.')
            # Read data.
            res = np.fromstring(gz.read(img * crow * ccol), dtype = np.uint8)
    except Exception as e:
        print(e)
    return res.reshape((img, crow * ccol))

def dense_to_one_hot(labels_dense, num_classes=10):
  """Convert class labels from scalars to one-hot vectors."""
  num_labels = labels_dense.shape[0]
  index_offset = np.arange(num_labels) * num_classes
  labels_one_hot = np.zeros((num_labels, num_classes))
  labels_one_hot.flat[index_offset + labels_dense.ravel()] = 1
  return labels_one_hot

def extract_labels(filename, img):
    try:
        with gzip.open(filename) as gz:
            n = struct.unpack('I', gz.read(4))
            # Read magic number.
            if n[0] != 0x1080000:
                raise Exception('Invalid file: unexpected magic number.')
            # Read number of entries.
            n = struct.unpack('>I', gz.read(4))
            if n[0] != img:
                raise Exception('Invalid file: expected {0} rows.'.format(img))
            # Read labels.
            res = np.fromstring(gz.read(img), dtype = np.uint8)
    except Exception as e:
        print(e)
    return dense_to_one_hot(res)

def load_mnist(image_data, label_data, img):
    data = extract_images(image_data, img)
    labels = extract_labels(label_data, img)
    # return np.hstack((data, labels))
    return {"images": data, "labels": labels}
Now that you have that code saved in a separate file, let’s get on with the meat of the algorithm that you’ll replace the boilerplate code with in your main algorithm file:
'''
MNIST prediction from pre-trained model
Tutorial created based on:
https://www.tensorflow.org/versions/r1.0/get_started/mnist/beginners
'''

import Algorithmia
import zipfile
import os
import tensorflow as tf
import shutil
from .loadmnistdata import load_mnist

client = Algorithmia.client()

def load_data(input):
    """
    Pass in {"mnist_images": "data://demo/tensorflow_mnist_data/t10k-images-idx3-ubyte.gz",
        "mnist_labels": "data://demo/tensorflow_mnist_data/t10k-labels-idx1-ubyte.gz"
    }
    """
    if input["mnist_images"].startswith("data://"):
        # "data://demo/tensorflow_mnist_data/t10k-images-idx3-ubyte.gz"
        mnist_images = client.file(input["mnist_images"]).getFile().name
    if input["mnist_labels"].startswith("data://"):
        # "data://demo/tensorflow_mnist_data/t10k-labels-idx1-ubyte.gz"
        mnist_labels = client.file(input["mnist_labels"]).getFile().name
    try:
        # load_mnist is a function from loadmnistdata.py to one hot encode images
        data = load_mnist(mnist_images, mnist_labels, 10000)
    except:
        print("Check your mnist image path in your data collection")
    return data

def extract_zip():
    """
    Get zipped model file from data collections
    """
    # Saved model protocol buffer and variables
    filename = "data://demo/tensorflow_mnist_model/model.zip"
    model_file = client.file(filename).getFile().name
    return model_file

def extract_model():
    """
    Unzip model files from data collections
    """
    # Model path from data collections
    input_zip = extract_zip()
    try:
        # Create directory to unzip model files into
        os.mkdir("unzipped_files")
        print("Created directory")
    except:
        print("Error in creating directory")
    zipped_file = zipfile.ZipFile(input_zip)
    # Extract unzipped files into directory created earlier returns none
    return zipped_file.extractall("unzipped_files")

def generate_gpu_config(memory_fraction):
    config = tf.ConfigProto()
    config.gpu_options.allow_growth = True
    config.gpu_options.per_process_gpu_memory_fraction = memory_fraction
    return config

# Unzip model files to directory
extract_model()

# Load model outside of apply() in global state so it only gets loaded one time
def create_session():
    # Set your memory fraction equal to a value less than 1, 0.6 is a good starting point.
    # If no fraction is defined, the tensorflow algorithm may run into gpu out of memory problems.
    fraction = 0.6
    session = tf.Session(config=generate_gpu_config(fraction))
    path_to_graph = "./unzipped_files/model"

    tf.saved_model.loader.load(
        session,
        [tf.saved_model.tag_constants.SERVING],
        path_to_graph)

    y_ = session.graph.get_tensor_by_name('Placeholder_1:0')
    y = session.graph.get_tensor_by_name('Softmax:0')
    x = session.graph.get_tensor_by_name('Placeholder:0')

    return (y_, y, x, session)

# Load model in global state so it only gets initialized once, subsequent calls will be faster
Y_, Y, X, SESSION = create_session()

def predict(mnist):
    correct_prediction = tf.equal(tf.argmax(Y, 1), tf.argmax(Y_, 1))
    calculate_accuracy = tf.reduce_mean(tf.cast(correct_prediction, tf.float32))
    accuracy = SESSION.run(calculate_accuracy, feed_dict={
        X: mnist["images"], Y_: mnist["labels"]})
    print("accuracy after serialization: {}".format(accuracy))
    predict_values = tf.argmax(Y, 1)
    prediction = predict_values.eval(session=SESSION,feed_dict={X: mnist["images"]})
    print("predicted classes: {}".format(prediction))
    return {"prediction": prediction, "accuracy": accuracy}

# API calls will begin at the apply() method, with the request body passed as 'input'
# For more details, see https://algorithmiaio.github.iohttps://algorithmiaio.github.io/algorithm-development/languages
def apply(input):
    data = load_data(input)
    inference = predict(data)
    tf_version = tf.__version__
    return "MNIST Predictions: {0}, TF version: {1}".format(inference, tf_version)
Now when you run this code, the expected input is:
{"mnist_images": "data://YOUR_USERNAME/YOUR_DATA_COLLECTION/t10k-images-idx3-ubyte.gz", "mnist_labels": "data://YOUR_USERNAME/YOUR_DATA_COLLECTION/t10k-labels-idx1-ubyte.gz"}
With the expected output:
MNIST Predictions: {'accuracy': 0.88910013, 'prediction': array([7, 2, 1, ..., 4, 8, 6])}, TF version: 1.2.0
Let’s take a look at another example that we’ve implemented ourselves, the tensor names entirely depend on your graph, so replace our variables and types with yours as necessary.
import Algorithmia
import tensorflow as tf
from tensorflow.contrib import predictor
import zipfile
import json
import os
from numpy import array, float32, object
client = Algorithmia.client()

def _create_float(v):
    return tf.train.Feature(float_list=tf.train.FloatList(value=[v]))

def _create_str(v):
    return tf.train.Feature(bytes_list=tf.train.BytesList(value=[bytes(v, 'utf-8')]))

def load_data():
    graph_uri = 'data://zeryx/SavedModelExample/savedmodel.zip'
    graph_file = client.file(graph_uri).getFile().name
    output_dir = '/tmp/model_dir'
    try:
        os.mkdir(output_dir)
        z = zipfile.ZipFile(graph_file, 'r')
        z.extractall(output_dir)
        z.close()
    except:
        pass
    return "{}/{}".format(output_dir, "1515693886")

graph_dir = load_data()

def apply(input):
    age = _create_float(input['age'])
    capital_gain = _create_float(input['capital_gain'])
    capital_loss = _create_float(input['capital_loss'])
    education = _create_str(input['education'])
    education_num = _create_float(input['education_num'])
    gender = _create_str(input['gender'])
    hours_per_week = _create_float(input['hours_per_week'])
    native_country = _create_str(input['native_country'])
    occupation = _create_str(input['occupation'])
    relationship = _create_str(input['relationship'])
    workclass = _create_str(input['workclass'])

    features = {
        'age': age,
        'capital_gain': capital_gain,
        'capital_loss': capital_loss,
        'education': education,
        'education_num': education_num,
        'gender': gender,
        'hours_per_week': hours_per_week,
        'native_country': native_country,
        'occupation': occupation,
        'relationship': relationship,
        'workclass': workclass
    }
    example = tf.train.Example(features=tf.train.Features(feature=features))
    inputs = example.SerializeToString()
    predict_fn = predictor.from_saved_model(graph_dir)
    predictions = predict_fn({"inputs":[inputs]})
    predictions['scores'] = predictions['scores'].tolist()
    predictions['classes'] = predictions['classes'].tolist()
    return predictions
As you can see, most of the processing is similar, but we use a different endpoint to actually create the graph.
If you want to create a custom graph session (aka with gpu memory optimizations like those defined below), pass a graph variable to predictor.from_saved_model like this: predict_fn = predictor.from_saved_model(graph_dir, graph=graph)
GPU memory tricks
Are you running into out of memory exceptions? Tensorflow attempts to allocate all available
gpu memory.
By defining a configuration with a max memory fraction you can ensure algorithm stability.
Also, uncomment allow_growth if you aren’t sure how much memory your algorithm needs, tensorflow will grow it’s gpu memory allocation as necessary.
def generate_gpu_config(memory_fraction):
    config = tf.ConfigProto()
    # config.gpu_options.allow_growth = True
    config.gpu_options.per_process_gpu_memory_fraction = memory_fraction
    return config
Publish your Algorithm
Last is publishing your algorithm. The best part of deploying your model on Algorithmia is that users can access it via an API that takes only a few lines of code to use! Here is what you can set when publishing your algorithm:
On the upper right hand side of the algorithm page you’ll see a purple button “Publish” which will bring up a modal:
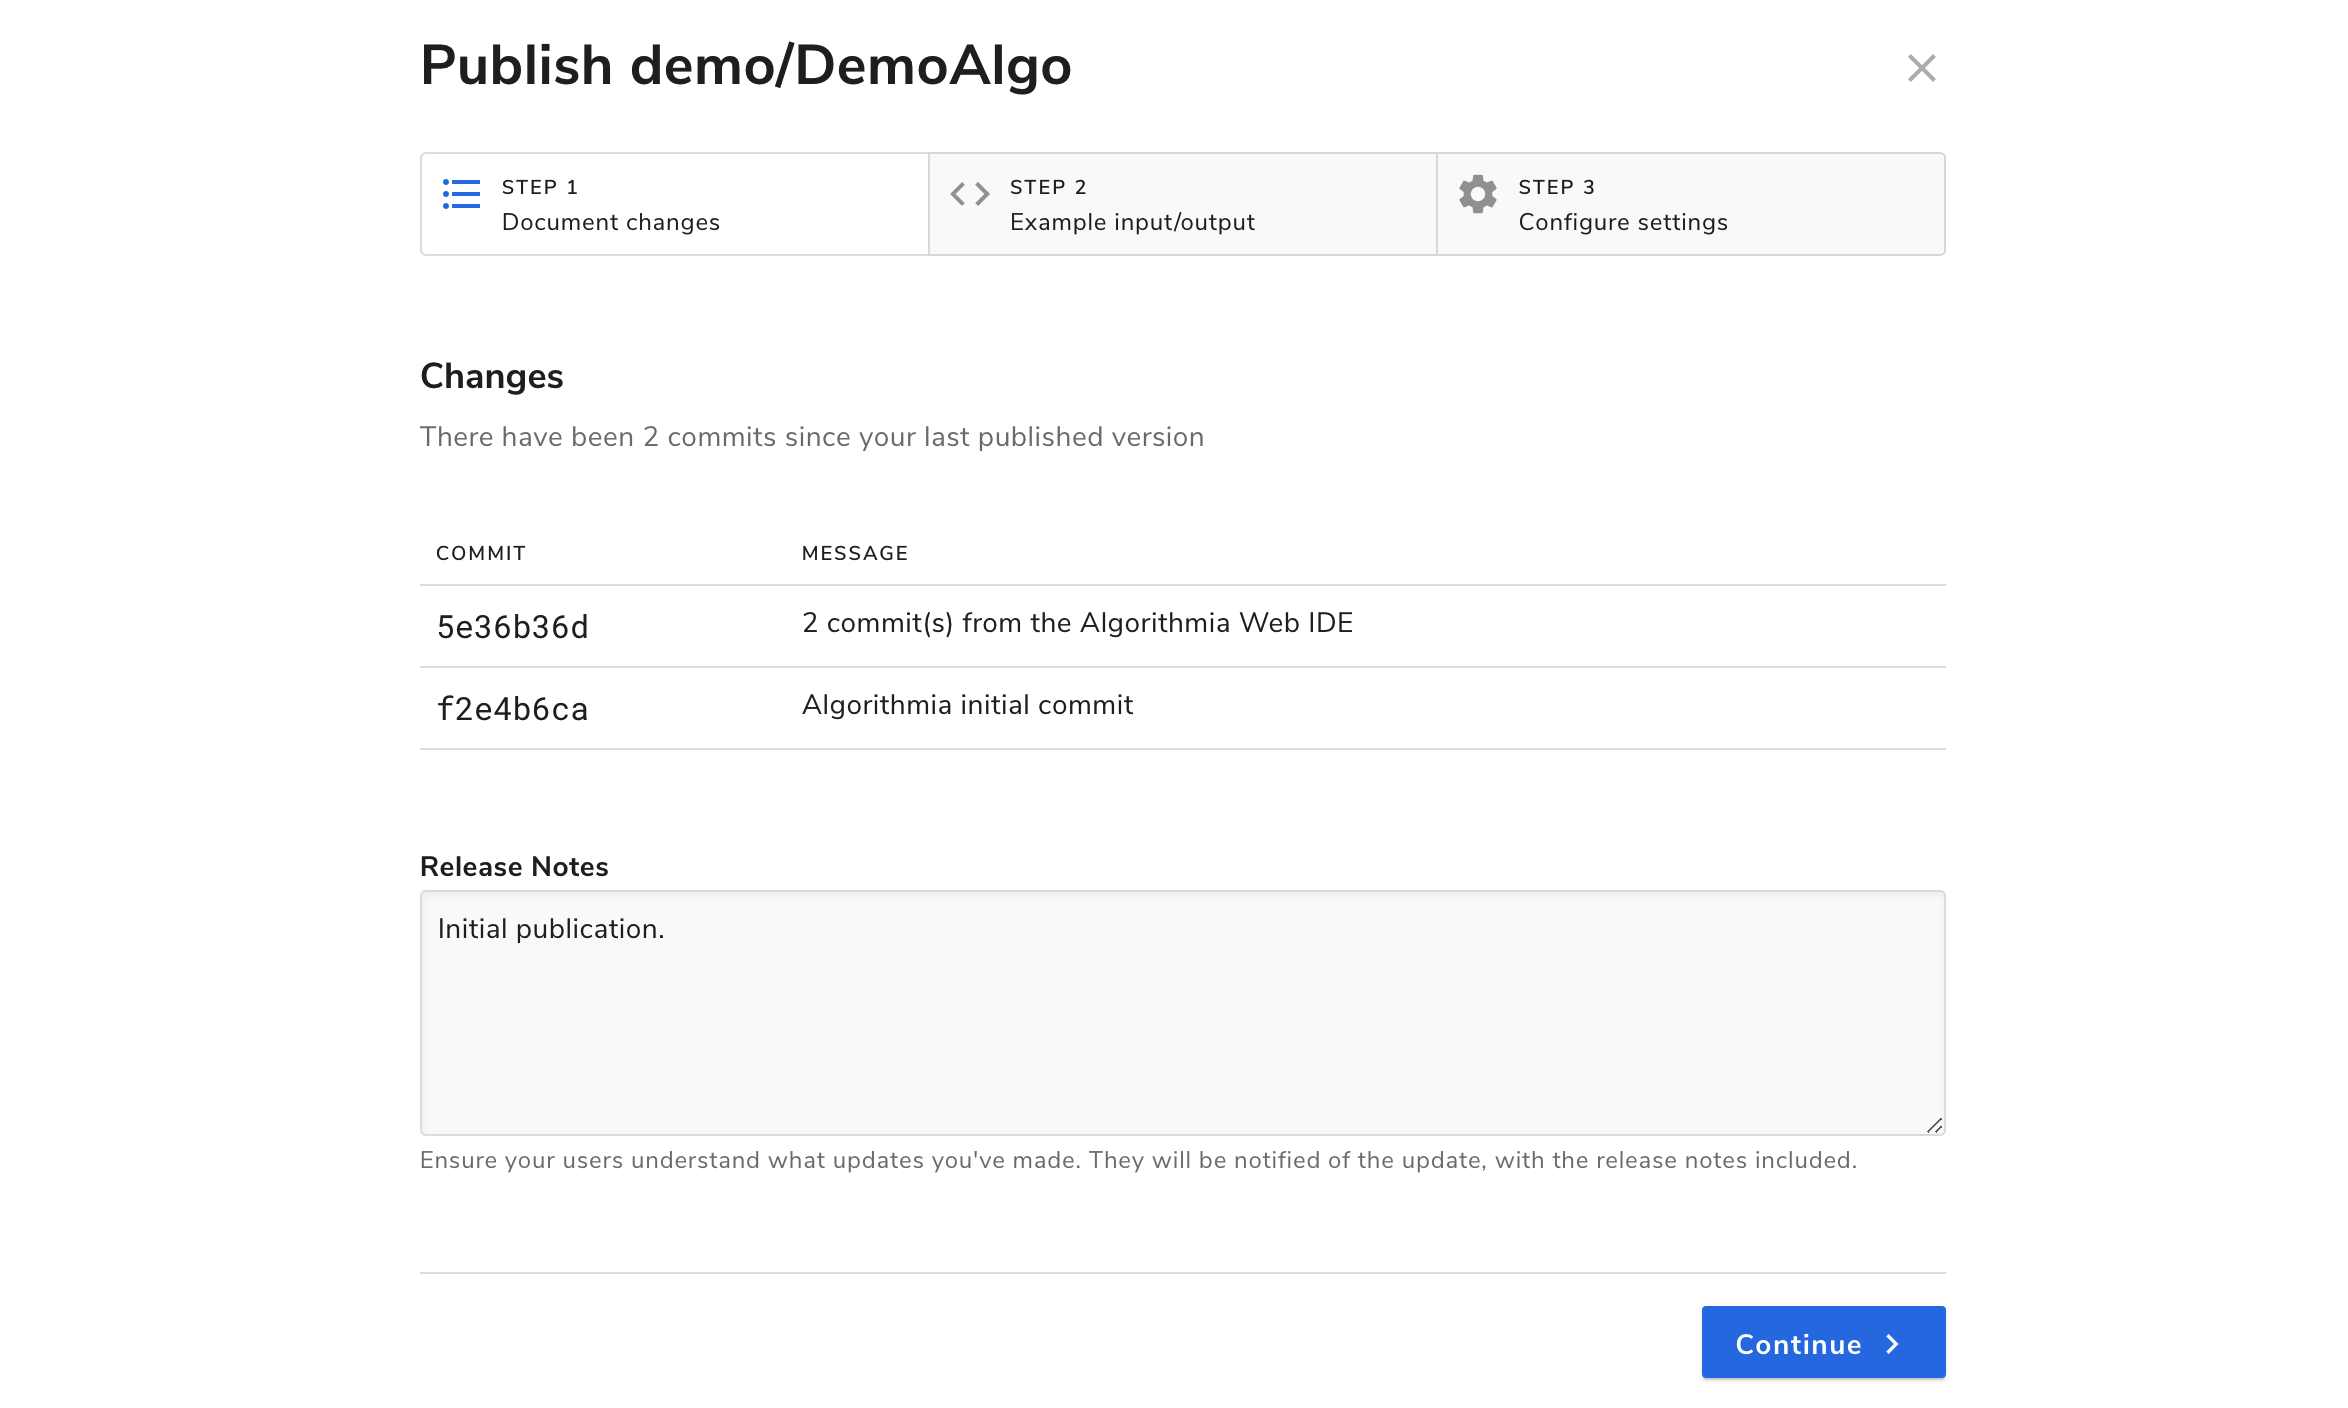
In this modal, you’ll see a Changes tab, a Sample I/O tab, and one called Versioning.
If you don’t recall from the Getting Started Guide how to go through the process of publishing your model, check that out before you finish publishing.
If you want to have a better idea of what a finished tensorflow algorithm looks like, check out: InceptionNet or one of the demos for Tensorflow MNIST CPU and Tensorflow MNIST GPU already mentioned in this guide.
That’s it for hosting your tensorflow model on Algorithmia!